We’re going into the next round of our WoW guide to the fighting guild in World of Warcraft. This time we bring you tactics for the bosses that await you at Rank 9: Big Bang, Knabbleh, Doctor Ironfist and Ahoo’ru.
Since its introduction with patch 5.1, the fighting guild has offered WoW players the opportunity to prove themselves in solo battles against sometimes very tricky PvE bosses. Today we provide you with tips and tricks with which you can defeat the bosses that await you at the ninth rank of the fighting guild. If you need tips on other Battle Guild bosses, you can find the link to all previous Battle Guild guides at the bottom.
WoW: The Battle Guild Rank 9 – The big hit
- explosion
- explosion
 After defeating Anthracite, you reach rank 9 and are allowed to challenge the last four opponents on the way to the maximum level 10. It starts with the huge bomb “The Big Bang”. In the English version of WoW, its name is “Big Badda Boom” – film fans will quickly recognize the reference to the science fiction classic “The Fifth Element” with Bruce Willis and Milla Jovovich.
The huge “Bob-omb” blend is still very unspectacular in the first few seconds of combat, since it has nothing on it apart from a moderately dangerous melee attack. But be warned: the longer the battle lasts, the more explosive the situation will be for your hero. As soon as you bring the bomb to 75 percent of its life points, it splits into three big crackers with an “explosion”, which in turn immediately go into close combat. You also take 35,000 points of damage from the fission. You now have to bring the three bombs to 50 percent health points in order to trigger the next division. So three enemies eventually become nine – and each of the explosions deals out 35,000 points of damage again. If you bring the nine little crackers to 25 percent of their life points, comes the final division. Again, three smaller versions of the exploded bombs jump into the arena, so that you eventually have to deal with up to 27 opponents. Both the last nine split explosions and the final explosion that seals the final end of the tiny crackers deal 35,000 damage counters each.
In the fight against the really big bang you have to master two challenges. The first thing to do is deal out enough damage (in the course of the fight, especially area damage) to finish off the bombs before the berserker phase is reached. Secondly, you must detonate your adversary in a targeted manner so that you are not caught by too many detonations at the same time, which would inevitably lead to the death of your hero. If possible, choose a style of play that has strong area attacks and also take talents and glyphs with you that increase your stamina or improve your self-healing powers. Any kind of control ability that lets you slow, root, or hurl the bombs back is also helpful. Paladins, Monks, Death Knights,
WoW: The Battle Guild Rank 9 – Knabbleh
- acid spit
- Knebble Strengthening
- sputum spray
Most of you have probably played the game “Snake” and steered the ever-growing snake through the room. The next battle guild challenge is based on this, in which you have to defeat the snake Knabbleh. The English name of your adversary, Nibbleh, is therefore also reminiscent of the video game “Nibbles”, which is a variant of the snake mechanic.
At first glance, Knabbleh doesn’t have any attacks that could pose a threat to you. Its melee attack leaves little impression on you, and the damage from its “Acid Spit” is also easy to take – at least in the standard version. The green snake leaves a pool of poison at its position, which provides your opponent with the “Knabbleh Strengthening” buff as soon as the reptile bathes in its own toxin. Thanks to the buff, Knabbleh hits 500 percent more with each charge and only takes half the damage.
So you have to drag Knabbleh around the arena for the entire fight and prevent the snake from lingering in its own venom for even a second. Since the green areas won’t disappear, you can’t just walk back and forth, you have to use the available space efficiently. At the beginning of the fight, move to the top right corner, because that’s where your enemy will appear. Grab the snake and move along the wall through the entire arena until you get back to where you started. Now you pull the snake through the room again in a second path, without crossing the existing green areas or drifting too far into the middle. Attention: Knabbleh distributes additional toxic areas in the arena with the “Sputumpuzzle”, which further restricts your movement possibilities.
Only if you are constantly on the move will you prevent your opponent from benefiting from the “Knabbleh strengthening”. At the same time, you must deal enough damage to the snake to defeat it before the berserk phase begins. About 115,000 damage per second is necessary for this, so it is important that you use bottles and potions and, if possible, join a buff group. By the way, the fight is a bit more difficult for melee fighters, because on the one hand they have to constantly move backwards so that Knabbleh doesn’t stop once in a while, and on the other hand they are not allowed to run away from the snake too quickly due to the rather small hit zone. Activate the “walk” mode by clicking on the “/” key in the numlock area of your keyboard, to specifically throttle your movement speed. You may have to switch off the mode in the arena corners and during evasive maneuvers for a short time so that Knabbleh doesn’t stand in the poison for too long due to the low speed. All long-distance fighters also look for the snake’s proximity, otherwise Knabbleh will try to reduce the distance to you with increased speed, which in turn means that the arena is occupied more quickly by the toxic surfaces. Above all, rely on attacks that you can use while moving and use skills such as “Favor of the Spirit Walker” (shaman) or “Ice Floes” (magician) to increase your flexibility while running. so that Knabbleh doesn’t stand in the poison for too long due to the low speed. All long-distance fighters also look for the snake’s proximity, otherwise Knabbleh will try to reduce the distance to you with increased speed, which in turn means that the arena is occupied more quickly by the toxic surfaces. Above all, rely on attacks that you can use while moving and use skills such as “Favor of the Spirit Walker” (shaman) or “Ice Floes” (magician) to increase your flexibility while running. so that Knabbleh doesn’t stand in the poison for too long due to the low speed. All long-distance fighters also look for the snake’s proximity, otherwise Knabbleh will try to reduce the distance to you with increased speed, which in turn means that the arena is occupied more quickly by the toxic surfaces. Above all, rely on attacks that you can use while moving and use skills such as “Favor of the Spirit Walker” (shaman) or “Ice Floes” (magician) to increase your flexibility while running.
WoW: The Battle Guild Rank 9 – Doctor Ironfist
- Left hook
- Right hook
- body punch
- uppercut
- hammer fist
 Doctor Eisenfaust, whose name says it all, is waiting for you in the third and easiest fight of the ninth tier. He attacks your hero with hooks and body punches. Your task is therefore to dodge the doctor’s attacks while dealing out around 120,000 damage per second in order to send him to the dust before reaching the berserk phase.
If you’ve already fueled the Emperor’s Will in Mogu’shan Vaults, the fight against Doctor Ironfist will look familiar. Your opponent always uses their five attacks in the same order: Left Hook, Right Hook, Body Punch, Uppercut, and finally Hammer Fist. As with Emperor’s Will, each attack hits a specific area around the boss, which can be clearly seen before it hits. The first four abilities primarily target the area in front of the boss, so the best way to avoid them is to simply run through Iron Fist. You can also escape the left and right hooks with short side steps. If you are hit by one of these four attacks, you are not immediately defeated.
In any case, you have to dodge the fifth attack: the Hammerhaust. Not only is the blow deadly instantly, but it also covers a large, circular area around the boss. If you have stun effects, simply counter the Hammerfist with a targeted stun. Otherwise, you immediately take your legs in your hands and leave the fist’s area as quickly as possible as soon as the doctor begins to cast the attack. Any kind of jumping ability or movement speed increase is worth its weight in gold here. By the way, as a long-distance fighter, like all frontline pigs, you always cuddle with the boss in the middle of the arena so that you have enough space to dodge on all sides. Especially the hit zone of the hammer fist is quite large – and if you have to go through the boss first,
WoW: The Battle Guild Rank 9 – Ahoo’ru
- rush
- rush impact
- point of light
- Divine Circle
- Complete healing
- Crusader Smash
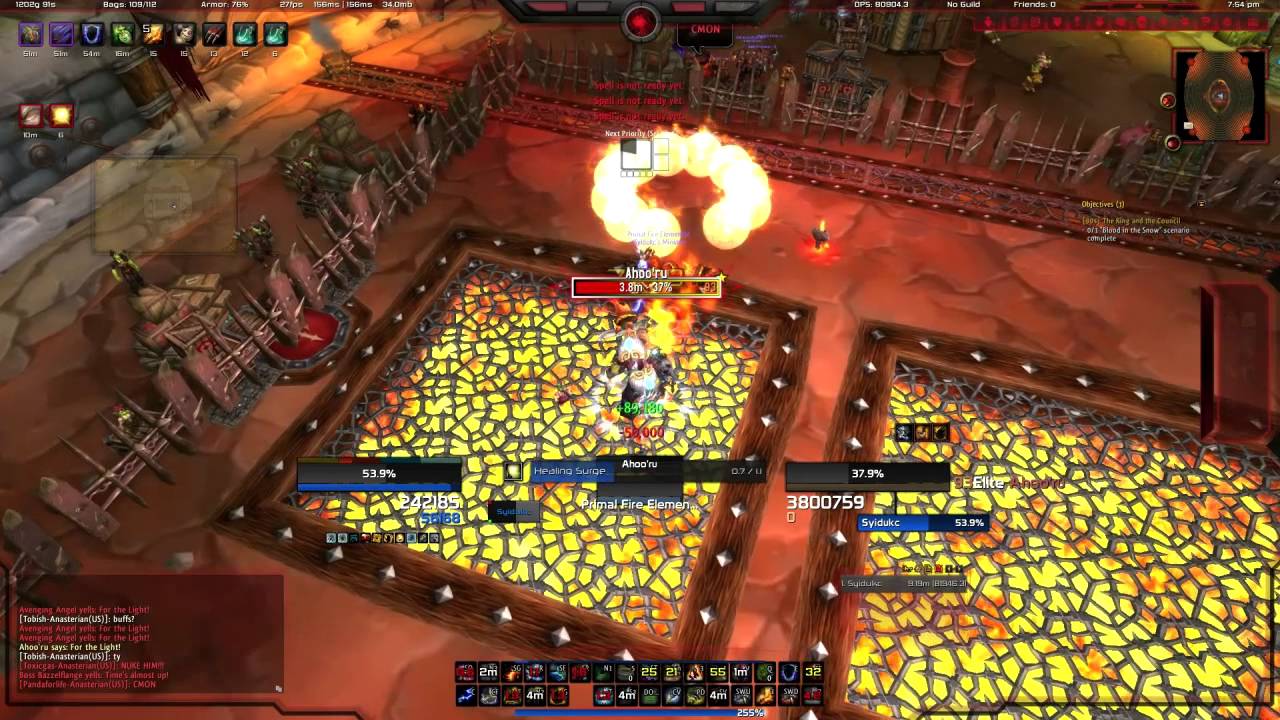
Before you can claim rank 10 in the Brawler’s Guild, you must defeat the draenei paladin Ahoo’ru in the final challenge. At the beginning of the fight, this is protected by an impenetrable divine shield that you must crack before you can deal damage to your opponent. For this you use the “points of light” that appear everywhere in the arena at the beginning of the battle. One of the golden-yellow flickering beings shines brighter than the others – and you have to run over this “point of light” as quickly as possible to summon an “Avenging Angel”. But make sure that you avoid contact with the other light figures – one touch costs you about 200,000 life points. Brings the “Avenging Angel” to 50 percent of his life points, so he can cast his Charge ability. While deadly to you, this attack is powerful enough to weaken Ahoo’ru’s Divine Shield. So move to the Paladin’s position, wait a moment for the attack to finish casting, and then quickly move away from Ahoo’ru so that he alone absorbs the impact of the Onslaught. You repeat this tactic twice more, because it is only on the third impact that the god’s shield collapses and phase 2 begins. so that he alone absorbs the impact of the “rush”. You repeat this tactic twice more, because it is only on the third impact that the god’s shield collapses and phase 2 begins. so that he alone absorbs the impact of the “rush”. You repeat this tactic twice more, because it is only on the third impact that the god’s shield collapses and phase 2 begins.
In the second phase, you only have a little time to reduce the approximately 10,000,000 health points of your opponent to zero. Now unleash all your damage-boosting options and squeeze as much damage out of your hero as possible. At the same time, you have to react correctly to two abilities of the paladin. On the one hand, he casts a healing spell with “Complete Healing”, which you must interrupt. If the healing comes through, you can give up. Second, Ahoo’ru casts a “Divine Circle” around your hero – a circle of orbs that slowly closes around you and from which you must escape without touching too many orbs. Each orb weakens you on contact with a stacking damage effect.
The damage requirements for this fight are huge, so you’ll need to play both phases as efficiently as possible. In phase 1 it is extremely important that you waste as little time as possible walking around and send three avenging angels in the direction of Ahoo’ru as quickly as possible. Any kind of movement increase is worth its weight in gold here – also witcher portals or defensive protection abilities, with which you can sometimes go through a “point of light”. In the best case, you summon the second avenging angel before the first has finished its charge, so that you always have a target to deal damage to. If you treat yourself with the Noggenfogger Elixirsmaller, you will also find it a little easier to navigate through the mass of light sparks. Ignite your damage-boosting options as the third angel charges your foe, allowing you to launch your attacks as soon as the god shield disappears.
In Phase 2, you’re particularly troubled by the circle, as it briefly prevents you from dealing damage. As a magician, if you summon your reflections shortly beforehand, there is a chance that one of the copies will get the circle. The same applies to hunters who play dead – the poor companion then has to pay for the circle. Warriors (Spell Reflection), Shamans (Glyph of Grounding Totem), and Hunters (Glyph of Mirroring Blades) can also reflect the orb’s damage back to Ahoo’ru, further boosting your damage-per-second stat.
What is WoW Classic?
World of Warcraft Classic is a true recreation of the original WoW as you know it from 2006. All parts of the game – from combat mechanics and talent trees to character models and zones – have been recreated, contributing to the authentic experience.
Getting Started
All players with an active World of Warcraft subscription or game time on their accounts have access toWoW Classic at no additional cost.
- Open the Blizzard Battle.net Desktop App and select World of Warcraft from the menu.
- Select World of Warcraft Classic from the Version menu. If you have more than one World of Warcraft account, you’ll see a second Account drop-down list. In this column, select the active account you want to play with.
- Click the Install button. The progress bar will tell you when your game is ready to play.
- Click the Play button when the installation is complete.
You will need to select the realm you want to play on from several different realm types. Make sure you choose the same realm as your friends – in World of Warcraft Classic, you can only group with characters that are on the same realm as you!
Heroes&WIKI, WoW Classic, World of Warcraft Classic, WoW Classic Guide, WoW Classic Guides


