

The time has come: The Dire Maul instance has become available in WoW Classic! In line with this, we are providing you with a guide, namely our retro guide to Dire Maul – including the tribute run with which you infiltrate the ranks of the ogres!
In WoW Classic has done something! The creators of the nostalgic experience from 2005 have unlocked the Dire Maul dungeon on the classic servers – including a nice loot and one of the coolest experiences ever, because you can use the tribute run to infiltrate the ranks of the ogres. Because we have adapted all the old guides to the new adventures with Cataclysm, we are now handing you the “old” retro guide from WoW Classic – for browsing and as a small pocket timetable.
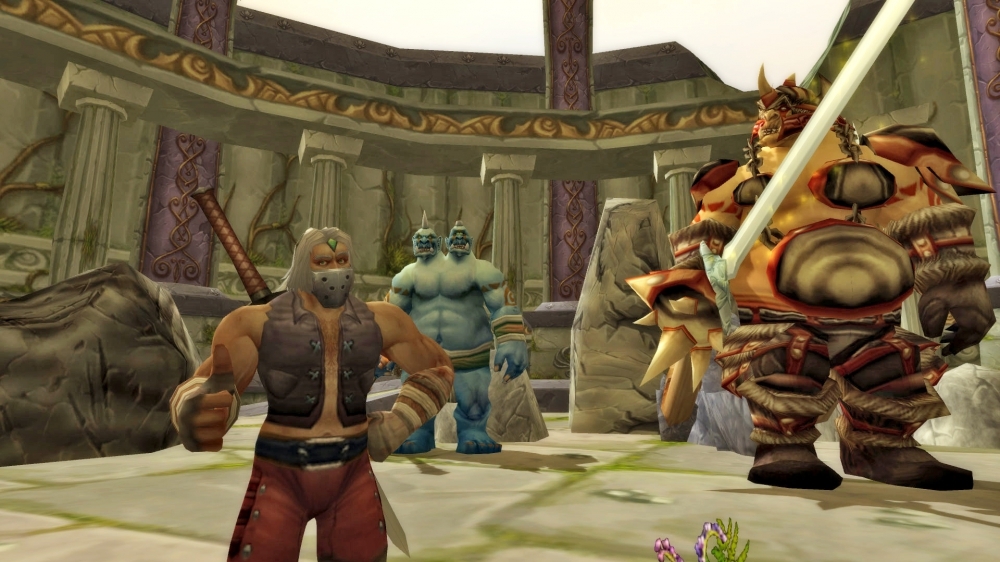
WoW Classic: Dire Maul
To the northeast of Feralas, the ruined ruins of Dire Maul await a brave band of adventurers. Ogres, demons, plant creatures and the remnants of an ancient race of elves have gathered here. Introduced in Patch 1.3, this instance is a platform for alternate outfitters, class quests, and equipment additions such as fire protection trinkets, and head/leg slot enchantments – and last but not least, the home of the fabled “Foror’s Compendium of Dragon Slaying”. Dire Maul – divided into three wings – is hereby In terms of versatility and variety, it is the ultimate endgame playground and a welcome change from Stratholme, Scholomance and Co – not least when it comes to item alternatives to the rather general T0 set.
Group composition
Dire Maul is not only alternative in terms of items, game principles and quests. In terms of group composition, there can also be a lot of variation here. A sufficiently well-established group can do without well-established group items such as the tank or the healer, which makes the various parts of the instance very exciting, but of course there is no argument against the classic structure with tank, healer, supporter and damage/crowd control. Since the number of players is limited to five, it is also advisable to go close to 60 with the average level.
General quests
North of Camp Mojache, Az’Tordin sits at the back entrance to the eastern part of Dire Maul and gives you the easiest start into questing in Dire Maul with the quest Pusillin and Elder Azj’Tordin, since on the one hand you can get through most of the eastern instance thanks to Pusillin and on the other hand, with the “Crescent Moon Key”, gain access to all other parts of the instance (including the library) and to the back entrance, which otherwise only a villain can get you into.
Two corridors behind Pusillin you will meet the blood elf witch Lethendris. Killing them is part of the quest Lethtendris’ Net (Alliance) or Lethtendris’ Net (Horde) which you can get and return from Feathermoon Fortress or Camp Mojache.
The quests Elvish Legends (Alliance) and Elvish Legends (Horde) are also available in the Fortress and Camp respectively. This quest takes you to the library in the northern part to find the remains of Kariel Winthalus there – this quest makes you sympathetic to the elf Lydros, through whom the various libram quests then become available.
A Reliquary of Purity from Rabine Saturna in Moonglade is the pre-quest to Shards of Felvine. This quest involves killing “Alzzin the Wildshaper” – a satyr at the end of the east instance – and later looting a quest item behind him.
On a bridge in the western part, an “Ancient Shen’dralar” will give you the quest Madness Within, which will take you from destroying the five pylons to fighting Immol’thar to fighting Prince Tortheldrin in the library. After he dies, you can use the follow-up quest, Treasure of the Shen’dralar, to open a chest near him.
Another drop from Tortheldrin are the Gauntlets of Gordok Might. These can be handed in to Captain Kromcrush after a successful “tribute run” (explanation below) in the north of the instance via the quest The Gordok’s Unfinished Business.

Dire Maul North / The Tribute Run
At the beginning of the instance you will repeatedly encounter pats with ogres and dogs that can approach from the front and behind. Here it is advisable to proceed slowly and to pull carefully.
Crowd Control
In the case of mob groups that hit quite badly, the group should first keep as many opponents as possible out of the fight with sheep, sap, ice traps, etc., in order to then gradually eliminate them.
Wandering Eye of Kilrogg
These green eyes, similar to those of the witcher, appear in two places in the instance and should be killed as quickly as possible, otherwise they will spawn two Voidwalkers after a short time, which can be quite dangerous to the group with their shadow flashes .
Way
From the entrance to the instance, always keep to the wall on the right, this will lead you through the instance.
Ward 1 – Guard Fengus
Once in the second hall of the instance, the group fights along the right wall while a rogue or other player with a flair for aggro range moves to the center of the room and retrieves a key from a chest that will take us through the rest the instance will bring. Care should be taken not to accidentally engage guard Fengus, who is wandering through the back of the room, in a fight. With the key you now open a gate and go underground.
Ward 2 – Guard Slip’kik
One eye, a few demons and ogres later you come across a destroyed ice trap. This is repaired with the thorium device you brought with you, along with frost oil, so that the guard Slip’kik, who keeps running back and forth, is caught in the trap when crossing it. After the eye patrolling here has also been fought, the Goblin Knot Thimblejack in the back corner is left alone despite the yellow exclamation mark, because only the ogre tannin in a basket one floor up brings him, with the help of the other utensils he has brought, to us of the quest The Gordok Ogre Suit to hand over the bloodless key to the penultimate encounter in this instance.
Station 3 – Captain Kromcrush
By wearing the ogre suit, the captain can easily be convinced in a conversation that he is out of place here and quickly clears the way for the group. A few mob groups later, the group can get ready for the last stand on the plateau in the middle of the room.
The End – King Gordok and Griniblix the Observer
In the final fight that follows, apart from the fact that the observer must not be killed under any circumstances, there is not much to note. If the fight is fought in the middle of the plateau, neither the captain’s mass fear spells nor the moderate damage abilities of the two ogres should cause you any problems.
After you have spoken to the ogre “Mizzle the Crafty” who appears after the victory, a box will appear in front of you that will reward you with food, potions and, above all, special items for the long, exhausting journey.
At this point you shouldn’t port out of the instance, but, armed with the “King of the Gordok” buff, which you will receive from Mizzle after you’ve spoken to him, go through the instance again to get rid of the three guards who haven’t been killed be rewarded with powerful buffs. Also, Knot Thimblejack can now be freed from his chains without consequences with a “Gordok Shackle Key” looted on the way through the instance. If you’ve gotten all of these things behind you, you’ve made it. You have mastered the most varied, most intensive and most entertaining small instance of the high-level area.
Dire Maul West – Ghosts, Pylons and Elf Princes
Tendris overgrown bark
After you’ve eliminated all of the “Protectors of Ironbark” patrolling the first hall, you can safely turn your attention to the first enemy. Tendris Wucherbark should be tanked facing away from the group to avoid endangering them unnecessarily since it hits with a hard cleavage attack. After defeating the big tree, follow the stairs back up and enter the ghost-infested part of the instance on the left or right balcony.
Magister Kalendris
In the middle of the corridor is Magister Kalendris. This delays his demise by taking over individual players. Watch out for the female “Spirit of the Eldreth” on trash mobs in the corridor, which caster with Silence. Roaming “Beasts of the Eldreth” can be spotted early with the Warlock’s Detect Invisibility buff. If there is no sorcerer in the group, you should pull carefully here in order not to have to fight too many adds at once.
Illyanna Raven Oak
Following the stairs up, you will find Illyanna Ravenoak next to the second and third pylons (the first could be deactivated in the entrance area) and the ancient Shen’dralar. If possible, you can sheep her bear companion or keep her in an ice trap as long as you take care of the hunter lady.
If you now follow a corridor into the last room of the instance, you come to what is probably the most difficult area in Dire Maul. There are two ways to disable the last two pylons, thereby destroying the barrier protecting the oversized beast Immol’thar in the center of the room.
First variant is the rigorous pulling and killing of both the air elemental patrols and the water elementals circling the center. It is also possible to avoid all fights here, apart from the mobs at the pylons. However, this requires patience and practice and can quickly lead to a wipe.
Immol’thar
Immol’thar himself is a tough nut to crack. Spawning “Eyes” should be instantly killed by a ranged attacker. The aggro holder should position himself here in the middle of the hall so as not to unintentionally pull left alive adds on ringside in the event that he is knocked back.
Prince Tortheldrin
After Immol’thar has blessed the temporal, it goes through a side passage into the library, which connects the western part with the northern part. There we face Prince Tortheldrin, who is no longer a real obstacle after the past hardships.
The easiest way to do this is to talk to the little imp Pusillin at the entrance and follow him through the instance. After you – a few enemy groups later – have killed him at the end of your journey, you can continue on your way through the instance. Lethtendris (kill the imp here first, as he attacks the group with powerful fire spells), the hydrospawn (caution: the AoE can hurl careless players into adds that have not yet been killed) and Zevrim Thornhoof (occasionally teleports a player to his altar are challenging boss fights on the way to the final boss of the instance.
What is WoW Classic?
World of Warcraft Classic is a true recreation of the original WoW as you know it from 2006. All parts of the game – from combat mechanics and talent trees to character models and zones – have been recreated, contributing to the authentic experience.
Getting Started
All players with an active World of Warcraft subscription or game time on their accounts have access toWoW Classic at no additional cost.
- Open the Blizzard Battle.net Desktop App and select World of Warcraft from the menu.
- Select World of Warcraft Classic from the Version menu. If you have more than one World of Warcraft account, you’ll see a second Account drop-down list. In this column, select the active account you want to play with.
- Click the Install button. The progress bar will tell you when your game is ready to play.
- Click the Play button when the installation is complete.
You will need to select the realm you want to play on from several different realm types. Make sure you choose the same realm as your friends – in World of Warcraft Classic, you can only group with characters that are on the same realm as you!
Heroes&WIKI, WoW Classic, World of Warcraft Classic, WoW Classic Guide, WoW Classic Guides