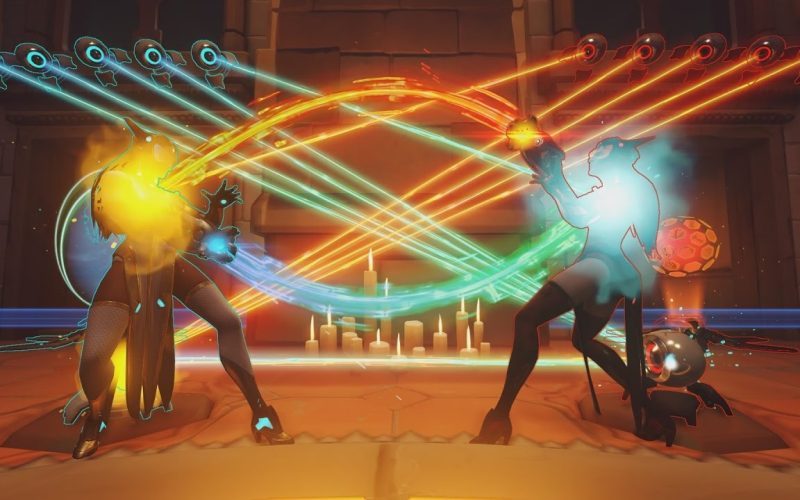
Prepare to elevate your Symmetra gameplay with our curated list of vital teleporter spots in Overwatch. Symmetra’s teleporter can be a game-changer when placed in strategic locations, offering your team a significant advantage in battle. Discover the ultimate teleporter spots that will surprise your enemies, secure objectives, and turn the tide of the game in your favor. Whether you’re defending or attacking, knowing these key spots can mean the difference between victory and defeat. Master the art of teleportation and lead your team to glorious triumph with our top 10 Symmetra teleporter spots.
Hanamura – Point AOver the roof
Point your teleporter towards the rooftops overlooking Hanamura’s Point A to give your team a significant advantage. This teleporter spot allows your team to bypass the chokepoint, catching the enemy off guard and gaining control of the point quickly. Be sure to communicate with your team to coordinate an effective push using this high-ground advantage.
High ground flank
For a more strategic approach, consider placing your teleporter on the high ground to the right of Point A. This spot provides a flanking route that can surprise the enemy team and disrupt their defense. Use this position to gain a positional advantage and secure key eliminations to push through the enemy’s defenses.
Additionally, having your teleporter on high ground gives Symmetra a clear view of the battlefield, allowing her to provide crucial information to her team and take out enemies from a safe distance.
Temple of Anubis – Point B
Left-side ledge
With the teleporter, Symmetra can place her teleporter on the left-side ledge of Point B on Temple of Anubis, providing a strategic advantage to the attacking team. This spot allows for quick flanking and surprise attacks on the enemy, enabling the team to gain the upper hand in crucial team fights.
Hidden alcove
Any seasoned Symmetra player knows the value of the hidden alcove on Point B of Temple of Anubis. This secluded spot offers protection as well as a perfect vantage point to oversee the battlefield and coordinate team movements. Placing a teleporter here can catch the enemy off guard and shift the momentum in your team’s favor.
A well-placed teleporter in the hidden alcove can turn the tide of the battle, allowing your team to swiftly reposition and surprise the enemy with a sudden assault. The element of surprise is key in Overwatch, and utilizing this spot effectively can lead to game-winning plays.
Eichenwalde – First choke
Above the gate
With a clear view of the enemy team approaching, setting up a teleporter above the gate on Eichenwalde can be a game-changer. This spot allows for quick repositioning of your team members, catching the opponents off guard as they push through the choke point. It is important to place turrets strategically around the teleporter to provide defense against flankers.
Balcony by point
First, secure the high ground on the balcony near the point with a teleporter to give your team a positional advantage. From this vantage point, Symmetra can easily cover multiple angles of attack and provide support to her team. Placing turrets in key locations can ensure the safety of the teleporter and alert your team to approaching enemies.
Plus, by teleporting your team members to the balcony, you can effectively surprise the enemy team and gain control of the battlefield. This strategic positioning allows Symmetra to control the flow of the battle and capitalize on high ground advantage to turn the tide in your team’s favor.
Volskaya Industries – Point A
Conveyor belt access
Now, one of the most effective teleporter spots on Volskaya Industries Point A is on the conveyor belt. By placing your teleporter at the start of the conveyor belt on the left side, your team can quickly bypass the choke point and catch the enemy off guard. This spot provides a quick and safe passage for your team to push through to the objective.
Platform over moat
Now, another strategic location for the teleporter on Volskaya Industries Point A is the platform overlooking the moat. Placing the teleporter here allows your team to easily access the high ground advantage and surprise the enemy from above. This spot is highly advantageous as it offers a clear line of sight to the objective and can be used to apply pressure on the enemy team.
Volskaya Industries Point A is a crucial juncture where the right teleporter placement can turn the tide of the battle. By utilizing the conveyor belt access and the platform over the moat, Symmetra players can provide their team with strategic positioning that can help secure a swift victory.
Hollywood – Elevator Flank
Behind enemy lines
Even though the elevator on Hollywood is primarily used to transport players to the high ground near the first checkpoint, Symmetra can use it to surprise enemies from behind. By placing a teleporter at the top of the elevator shaft, Symmetra can quickly move her team to an unexpected location, catching their enemies off guard.
High ground transition
One effective strategy on Hollywood is to transition from the low ground to the high ground near the first choke point. Symmetra’s teleporter can make this transition seamless, allowing her team to take advantage of the height advantage and the element of surprise against the enemy team.
With strategic placement, Symmetra’s teleporter can help her team secure critical picks from the high ground, turning the tide of the battle in their favor. It is imperative for Symmetra players to communicate effectively with their team to maximize the teleporter’s utility and impact on the game.
King’s Row – Third phase
Window to high ground
Your team has just captured the second point and now it’s time to set up a strong defense for the final phase on King’s Row. Symmetra’s teleporter can be a game-changer in this area, providing quick access to key high ground positions for your team to maintain control over the battlefield. Placing the teleporter near the window overlooking the streets can give your team a strategic advantage, allowing them to rain damage down on the enemy while remaining safely out of reach.
Behind final point
For a more aggressive approach, consider placing the teleporter behind the final point on King’s Row. This unexpected location can catch the enemy team off guard and provide your team with a surprise flank that can quickly turn the tide of the battle. By teleporting your team members directly behind the enemy, you can easily disrupt their formation and create chaos, giving your team the opportunity to secure the win.
Little do many players know, this spot can be a game-changer as it allows your team to outmaneuver the enemy and take them by surprise. Make sure to communicate with your team to coordinate the attack and maximize the effectiveness of this teleporter spot.
The key to success in utilizing Symmetra’s teleporter on King’s Row’s third phase is positioning it in strategic locations that offer your team a significant advantage over the enemy. Experiment with different placements to find the spots that work best for your team composition and playstyle, and don’t be afraid to adapt and change your strategy as the battle unfolds.
Numbani – Top Routes
Above Payload Path
All Symmetra mains should know the value of utilizing high ground to maximize the potential of their teleporter. One sneaky spot on Numbani is above the payload path, where Symmetra can place her teleporter to ferry teammates directly behind enemy lines.
Defender’s High Ground
Defenders on Numbani can also take advantage of the high ground to set up a powerful defense. Positioning the teleporter on the high ground gives defenders a significant advantage, allowing them to swiftly reposition and surprise the enemy team.
This strategic placement can catch attackers off guard, disrupting their push and potentially turning the tide of the battle in favor of the defending team. It’s crucial for defenders to maintain control of the high ground and utilize their teleporter effectively to secure victory on Numbani.
Dorado – Second Stage
Across Central Building
Assuming your team is pushing through the chokepoint near the payload stop, placing the teleporter across the central building can be a game-changer. This spot provides a quick escape route for your team, allowing them to regroup swiftly and flank the enemy from unexpected angles.
Above the Archway
Above the archway is another strategic location for Symmetra’s teleporter on the second stage of Dorado. This spot offers a high ground advantage that can catch enemies off guard. Placing the teleporter here allows your team to access key vantage points, control the flow of the battle, and provide support from above.
Archway: The archway is a focal point on the map and a potential hotspot for enemy engagements. By placing the teleporter above it, your team gains a strategic advantage by being able to navigate the area with ease and surprise the opposing team with well-coordinated attacks.
Watchpoint: Gibraltar – Hangar
Many Symmetra players may find Watchpoint: Gibraltar’s Hangar section a challenging area to strategize teleporter placements. With its open spaces and various levels, knowing the best spots can make a significant difference in the game outcome.
Under the bridge
There’s a sneaky teleporter spot under the bridge in the Hangar section of Watchpoint: Gibraltar. This location provides cover and allows your team to surprise the enemy from an unexpected angle, catching them off guard. It’s an excellent way to flank the opposing team and create chaos during a crucial push.
Sniper perches
Clearly, sniper perches are crucial teleporter spots in Watchpoint: Gibraltar’s Hangar. These elevated positions offer a strategic advantage for your team’s snipers to pick off enemies from a safe distance. Placing a teleporter near these locations can ensure quick and easy access for your team’s sharpshooters to reposition and maintain control of the battlefield.
Sniper perches provide a high ground advantage, allowing your team to have a clear line of sight over the entire area. This vantage point not only allows for better visibility but also makes it challenging for the enemy team to counterattack effectively.
Lijiang Tower – Control Center
Above the point
Not all teleporter spots are created equal, and when it comes to the Control Center on Lijiang Tower, finding the perfect spot can make all the difference. Choosing the right spot above the point can give your team a strategic advantage in gaining control of the objective and holding it against the enemy team.
Outside balcony ledge
Clearly, one of the most effective teleporter spots in the Control Center map is on the outside balcony ledge overlooking the point. Placing your teleporter here can allow your team to quickly flank the enemy and catch them off guard, turning the tide of the battle in your favor.
It is imperative to communicate with your team about the location of the teleporter on the outside balcony ledge, as it can offer a significant advantage in controlling the point. Flanking the enemy team from this vantage point can disrupt their positioning and open up opportunities for your team to push forward and secure victory.
Conclusion
Drawing together the top ten Symmetra teleporter spots in Overwatch has showcased the strategic potential of this hero when utilized effectively. By understanding the map layouts and team dynamics, players can maximize Symmetra’s teleporter to surprise opponents, gain advantages, and secure victories. Experimentation and coordination within a team are key to mastering these spots and successfully implementing them in gameplay. With practice and dedication, players can elevate their Symmetra gameplay to new heights and make a significant impact on the battlefield.


