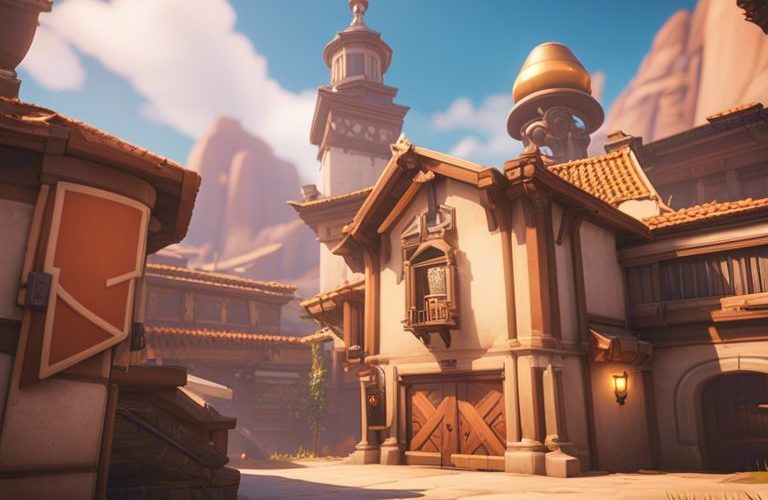
Gather around, Overwatch enthusiasts, as we explore into the top 10 most strategic map points in the game. Navigating the diverse maps in Overwatch requires strategic prowess and tactical thinking to secure victory. From chokepoints that can make or break a push to high ground vantage points offering lethal advantages, mastering these key locations is crucial for success in the game. Let’s explore the dangerous corners, the powerful positions, and the game-changing spots that will elevate your gameplay to new heights.
Temple of Anubis – Point B
High Ground Ledge
For those looking to gain an advantage on Temple of Anubis’ Point B, mastering the art of controlling the high ground ledge is crucial. This strategic location allows players to have a commanding view of the point, giving them the upper hand during team fights. Positioning snipers or heroes with area damage abilities here can make all the difference in securing a successful defense or push.
Archway Defense
Even though the Archway on Point B seems like a straightforward chokepoint, it holds a critical defensive position on the map. Controlling this area can bottleneck the enemy team’s advance, forcing them to funnel through a narrow passage that leaves them vulnerable to focused attacks. Teams that can effectively hold this position have a higher chance of successfully defending the point.
It is important to note that the Archway Defense relies heavily on teamwork and communication. Coordinating ultimates and abilities to maintain control of this chokepoint can be the key to victory on Temple of Anubis’ Point B.
King’s Row – Point A
Hotel Balcony
To best defend Point A on King’s Row, positioning yourself on the Hotel Balcony offers a strategic advantage. Snipers like Widowmaker or Hanzo can utilize the elevated vantage point to pick off enemies from a safe distance. Tanks such as Reinhardt can also benefit from the cover it provides while protecting teammates and controlling the point.
Statue Area
To control the Statue Area is crucial in securing Point A on King’s Row. Flankers like Tracer or Genji can utilize the narrow corridors to surprise enemies and disrupt their formation. The high ground near the statue provides a great viewpoint for DPS heroes to rain down damage on the enemy team.
Some heroes excel in close-quarter combat, making them ideal for defending the Statue Area. Characters like Reaper and Doomfist can dominate in tight spaces and prevent enemies from advancing further.
Hanamura – Point B
Top Right Ledge
Hanamura’s Point B offers multiple strategic positions for defenders to hold off incoming attackers. One of the key spots to control is the Top Right Ledge, which overlooks the point and provides a clear line of sight to defend against enemies trying to make their way in. Utilize heroes with long-range capabilities such as Widowmaker or Hanzo to capitalize on this advantageous high ground position, making it difficult for the enemy team to push through.
Garden Entry
Clearly marked by the stone archway, the Garden Entry is a crucial chokepoint that defenders can use to funnel enemies into a concentrated area, making it easier to focus fire and disrupt the opposing team’s momentum. Holding this entry point allows defenders to control the flow of the battle and limit the attackers’ options for entry.
To maximize the effectiveness of defending the Garden Entry, position tank heroes like Reinhardt or Orisa at the front to absorb incoming damage and create a strong barrier. Support them with heroes who can deal high damage output or provide crowd control to prevent the enemy team from advancing easily. Coordination and communication among teammates are vital to maintain control over this critical area on Hanamura’s Point B.
Eichenwalde – Drawbridge
Great Hall Perch
Despite being a highly contested area, the Great Hall Perch in Eichenwalde provides a strategic vantage point for defenders to hold off incoming assaults. It offers a clear line of sight to the payload path and key choke points, allowing for efficient eliminations and control of the battlefield.
Bridge Underpass
Underpass offers a unique route for attackers to flank the enemy team and catch them off guard. It also provides cover from long-range attacks and allows for quick repositioning during engagements. However, it requires coordination and speed to capitalize on its advantages effectively.
For instance, teams can use the Bridge Underpass to surprise the defenders by quickly advancing towards the objective or setting up powerful ultimates such as Zarya’s Graviton Surge or Reinhardt’s Earthshatter. This can turn the tide of the battle in their favor and secure valuable progress towards victory.
Volskaya Industries – Point A
Truck Cover
After capturing the first point on Volskaya Industries, defenders often choose to set up defensive positions around the truck cover. This area provides excellent protection from enemy fire while also offering clear lines of sight to the attacking team’s approach. Careful positioning of tanks and healers behind the truck cover can make it challenging for the enemy team to push through and capture the point.
Platform Overlook
There’s a crucial high ground overlooking Point A on Volskaya Industries, known as the Platform Overlook. This vantage point allows snipers and ranged heroes to pick off enemies from a safe distance, making it a strategic position for defenders to control. Attackers must be wary of enemies positioned on the Platform Overlook, as they can easily disrupt any attempts to capture the point.
If attackers manage to secure the Platform Overlook, they gain a significant advantage in securing Point A. With a clear view of the entire battlefield, attackers can coordinate their efforts and easily pick off defenders attempting to hold their ground.
Hollywood – Wild West
Saloon Rooftop
To take control of the Saloon Rooftop in Hollywood, teams must coordinate their movements and strategies carefully. The rooftop provides a significant advantage due to its height and vantage point over the surrounding area. An organized team can use it to pick off enemies from a distance, control the high ground, and provide vital support to their allies on the ground.
Jail Flank
While navigating the Jail Flank in Hollywood, players should be aware of the potential for ambushes and surprise attacks. The twisting corridors and multiple entry points make it a perfect location for defenders to hide and catch attackers off guard. Teams must communicate effectively and use flank-checking techniques to ensure they are not taken by surprise.
The Jail Flank can also be a strategic pathway for attackers looking to bypass the main choke point or distract defenders. By utilizing this route, players can create confusion and split the enemy team’s attention, opening up opportunities for their teammates to push through and secure the objective.
Watchpoint: Gibraltar – Hangar
Watchpoint: Gibraltar’s Hangar section offers a unique and challenging setting for strategic gameplay in Overwatch. Understanding the key map points and how to utilize them effectively can make all the difference in achieving victory on this map.
Shuttle Defense
You have to carefully position your team to defend the shuttle as it moves through the Hangar. Utilize heroes with high damage output and crowd control abilities to hold off the opposing team’s advances. Keeping an eye on flank routes and coordinating ultimates can turn the tide in your favor.
Catwalk Control
There’s a strategically important catwalk that runs above the Hangar, providing a vantage point for snipers and ranged damage dealers to control the battlefield. Securing this area can give your team a significant advantage in eliminating enemies and providing valuable information on enemy movements.
With proper positioning and communication, your team can maintain dominance over the Hangar, denying the opposing team crucial ground and forcing them into unfavorable engagements. Controlling the catwalk can enable your team to set up ambushes and effectively funnel the enemy into kill zones, securing a tactical advantage.
Numbani – Payload Streets
Bus Blockade
For strategic positioning on Numbani’s Payload Streets, the Bus Blockade is a crucial point to control. This location offers cover for defenders and can stall the progress of the payload significantly. Attackers must be wary of this choke point and plan their approach carefully to break through.
High Ground Adjacency
You’ll want to pay close attention to the High Ground Adjacency near the second checkpoint on Numbani. This elevated position provides a clear line of sight for snipers and long-range damage dealers to pick off enemies while staying out of harm’s way. Securing this area can give your team a significant advantage in defending or pushing the payload.
Adjacency to the high ground on Numbani’s Payload Streets can be a game-changer for either team. Defenders can rain down damage from above, while attackers gain a strategic vantage point to control the battlefield. Being mindful of this position and utilizing it effectively can turn the tides of battle in your favor.
Lijiang Tower – Control Center
Server Room Hold
Hold in the server room of Lijiang Tower’s Control Center provides a key strategic advantage for defenders. The central location and tight corridors make it a perfect choke point to hold off attackers. Utilize long-range heroes like Widowmaker or Hanzo to pick off enemies from a distance, while setting up barriers with tanks like Reinhardt or Orisa to block incoming damage.
Upper Walkway
Room in the upper walkway overlooking the point allows for a vantage point advantage, giving defenders an aerial view of the battlefield. This position is perfect for high-damage heroes like Pharah or Junkrat to rain down chaos on the enemy team. Coordinate with your team to maintain control of the high ground and prevent enemies from sneaking up behind you.
A key element to remember when holding the upper walkway is to watch out for flankers attempting to disrupt your positioning. Positioning heroes like Ana or Zenyatta in the backline can help protect against enemy divers while keeping your team healed and providing crucial support with their abilities.
Dorado – Final Checkpoint
Market Overlook
Now, as you approach the final checkpoint on Dorado, the market overlook provides a strategic vantage point for defenders. This high ground allows for snipers to pick off enemies before they reach the payload, giving your team a significant advantage in controlling the flow of the game.
Fountain Statue
To the left of the payload at the final checkpoint lies the Fountain Statue, a key area for teams to regroup and mount a final defense or push. This location offers cover and a central meeting point for coordinating ultimates and strategies before the last push.
Checkpoint: Fountain Statue – The Fountain Statue area is highly contested due to its central positioning and cover it offers, making it a crucial point for both attackers and defenders to control. Teams need to utilize this area effectively to secure victory.
This area can be a make or break point in the match, as controlling the Fountain Statue can mean the difference between victory and defeat. Teams must be vigilant in holding this position, as losing control can give the opposing team a significant advantage in the final moments of the game.
Summing up
Taking this into account, understanding the strategic map points in Overwatch is vital for success in the game. By knowing the top 10 most strategic map points, players can make informed decisions, formulate effective strategies, and outmaneuver their opponents. These key locations offer valuable advantages when captured and defended properly, influencing the outcome of a match significantly. Mastering these map points can give players a competitive edge and elevate their gameplay to a higher level. By studying these strategic positions, players can gain a deeper understanding of the game’s dynamics and improve their overall performance on the battlefield.


