

You can significantly enhance your gameplay in Rainbow Six Siege by mastering your gadget usage. Understanding how to deploy your utility effectively allows you to create opportunities, support your team, and outsmart your opponents. In this guide, you will learn techniques to maximize the impact of your gadgets, from strategically placed traps to effective drone use. Join us as we dissect the various utilities and reveal strategies that can elevate your game to the next level.
How to Use Gadgets Effectively
Clearly, the effective usage of gadgets in Rainbow Six Siege can make or break your team’s strategy. Each operator comes equipped with unique gadgets that serve different purposes, and maximizing their potential requires understanding when and how to deploy them. From deploying drones to using explosives, taking full advantage of these tools can significantly impact the outcome of the match.
Choosing the Right Gadget for Your Operator
Right from the start, you should familiarize yourself with your operator’s gadgets and their functions. Each operator is designed with specific roles in mind, and choosing the right gadget aligns with your team’s strategy. For instance, selecting a hard breacher when your team needs to open reinforced walls can provide that crucial entry point. Alternatively, if you are playing an entry fragger, equipping an operator with a flashbang could help you disorient enemies, giving you and your team an advantage in engagements.
Additionally, analyzing your team composition and the objectives of each round is important. If you notice your enemies are heavily barricading the objective, choosing gadgets that can counter that—like breach charges or explosives—will be more effective. Always assess your surroundings and adjust your gadget choices accordingly to ensure that you are making the most impactful decisions for your team.
Timing Your Gadget Usage
Your understanding of timing can greatly enhance the effectiveness of your gadgets. Using your gadgets early could give your team information or breaching capabilities, while using them at the right moment during an engagement can turn the tide in favor of your squad. For example, deploying a smoke grenade just as you begin an assault distracts and confuses the defenders, allowing your team to push in more effectively. Conversely, if you wait too long, your gadget could become ineffective, missing the opportunity to open up a vital path or gather information.
Timing your gadget usage doesn’t just mean knowing when to deploy them but also knowing when to hold back. Consider your team’s position, the enemy’s status, and the overall match dynamics. Establishing communication with your teammates about when you’ll use your gadgets can create synchronized plays that put immense pressure on the enemy team.
Location Considerations for Gadget Deployment
There’s a significant strategic component to where you choose to deploy your gadgets. Optimal placement can mean the difference between a successful execution and complete failure. Deploying gadgets in high-traffic areas can help catch opponents off-guard, while others might benefit from being hidden to maintain the element of surprise. Think about creating potential trap setups or placing drones in locations where they can gather valuable intel without being easily spotted.
Moreover, considering the layout of the map and the objectives is important. Gadgets deployed near objectives can secure areas or provide vital information regarding the enemy’s approach. Always remain adaptable with your placements, and be aware of how the flow of the round develops. Your gadgets’ effectiveness is closely tied to their location, so leverage the map’s geography to enhance your team’s potential.
Gadgets can create opportunities if placed strategically. Consider using areas with limited visibility or placing traps in locations where enemies are likely to pass through. Testing different deployment methods in custom games can give you valuable insights into how gadget locations can influence gameplay, helping you refine your approach in competitive matches.
Smoke Grenades
For players venturing into the chaotic world of Rainbow Six Siege, mastering your gadget usage is necessary for team success, and smoke grenades hold significant utility in tight situations. These devices can obscure enemy vision, provide cover during critical pushes, and manipulate the battlefield to your advantage. Understanding how to deploy and utilize smoke grenades effectively can turn the tide in unfavorable encounters, allowing you and your team to move more freely or catch opponents off guard.
How to Deploy Smoke Grenades
The proper deployment of smoke grenades depends on your strategic goals during each round. You should aim to throw your smoke in locations that will either obstruct enemy sightlines or cover your team’s movements as you advance. Ideally, anticipate where enemies may be located and deploy the smoke to not only conceal your actions but also push them out of their positions. Make sure to communicate with your team to coordinate an effective push while the smoke is down; optimal timing can secure necessary objectives and eliminate foes who are caught by surprise.
Furthermore, it’s necessary to ensure you have a clear route for escape or advancement once you deploy your smoke grenade. The explosion of the gadget creates a smoke cloud that lasts for a few seconds, so plan your movements accordingly. You might also consider using smoke grenades in conjunction with other gadgets, such as stun grenades or breach charges, to maximize the disorientation of your enemies and create an opening for your team.
Utilizing Smoke for Cover
Deploy smoke grenades to provide critical cover when moving into a contested area or attempting to defuse a bomb. In such situations, the smokescreen allows you and your teammates to navigate without being exposed to enemy fire. Utilize the cover effectively by moving quickly and efficiently; the smoke can also give you the opportunity to reposition or flank enemies, adding an additional layer of unpredictability to your approach.
Grenades play a pivotal role in ensuring that you can dictate the pace and movement of engagements. By creating a temporary cloud that obscures vision, your team can integrate smoke into your strategy, enabling you to execute well-coordinated pushes, retreats, or site takes. Mastering this aspect of smoke grenade usage can make all the difference, giving you the upper hand over your adversaries and increasing the likelihood of successful mission completion.
Countering Enemy Vision with Smoke
Little do players realize how effectively smoke grenades can neutralize enemy vision, making it much harder for opponents to land accurate shots or maintain control over an area. When you deploy smoke grenades, you create a tactical barrier that prevents foes from spotting your movements, effectively leveling the playing field during skirmishes. Be aware of how the smoke can shift and move, as enemy players may try to use that to their advantage by predicting your location.
Utilizing smoke grenades to counter enemy vision also requires you to find a balance between offensive and defensive play. Your main goal should always be to exploit the smoke’s cover while minimizing exposure. This is particularly effective during the final moments of a round, when enemies might be more desperate to maintain control. By ensuring your smoke placements are strategic, combined with good team coordination, you’ll make it much harder for opponents to track your movements and defend against your maneuvers effectively.
Vision Control with Smoke
Vision control is necessary in Rainbow Six Siege, and smoke grenades serve as powerful tools for blinding your enemies. By deploying these gadgets wisely, you can eradicate their sightlines and maneuver freely. As a player, it’s your responsibility to manage the smoke effectively, ensuring you maximize the chaos while maintaining communications with your teammates. This approach can significantly impact the game, providing you with the required edge to secure victory.
Hard Breachers’ Utility
Despite the individualized nature of Rainbow Six Siege, the collective synergy of your team can elevate your gameplay to new heights. Hard breachers play an imperative role in executing successful strategies, as their unique gadgets allow them to create new entry points in reinforced walls. This ability to alter the battlefield directly impacts your team’s tactical options, making understanding the utility of hard breachers a key element of your success.
Introduction to Hard Breaching Gadgets
Utility in the form of hard breaching gadgets is primarily represented by operators such as Thermite, Hibana, and Ace. Thermite’s Exothermic Charges can create large openings in reinforced walls, while Hibana employs her X-Kairos pellets to cut through surfaces at range. Ace’s Selma will create multiple breaches with just one gadget, adding versatility to your approach. Mastering these tools can unlock new opportunities for both offense and defense.
Best Practices for Using Breaching Charges
Introduction to effective breaching techniques can set you apart as a valuable asset to your team. Positioning is key; make sure to scout out the environment and understand where your enemies might be hiding before initiating a breach. Timing also plays a significant role in hard breaching. Coordinate with your teammates to ensure that both you and your support are ready to capitalize on the newly created pathway. The best breaches occur when you have back-up firepower ready to cover your entry.
A strong opening can lead to controlled chaos, allowing you to leverage the diversion created by your breach. Ensure you communicate to your team the timing and location of your breaching maneuvers. Use your gadgets safely, always considering potential traps or enemies lurking nearby. Bait out defensive gadgets like Bandit’s Shock Wire or Kaid’s Electroclaws before committing to your breach to minimize risk and maximize tactical advantage.
Coordinating with Teammates for Successful Breaches
Any successful breach in Rainbow Six Siege hinges on well-coordinated teamwork. It is not enough to merely activate your breaching gadget; you also need to communicate effectively with your teammates to establish roles in the engagement. This collaborative approach will allow you to breach with backup, ensuring that you can swiftly eliminate any defenders who might attempt to thwart your entry.
This level of coordination requires regular communication, whether through voice chat or quick pings. Make sure your teammates are aware of your breaching plans, including which walls you plan to breach and when you will do so. This will not only help maximize your chances of success but also make ensuing gunfights more manageable. Ultimately, developing a shared understanding with your team about breaching strategies will lead to more effective and dangerous offensive plays.
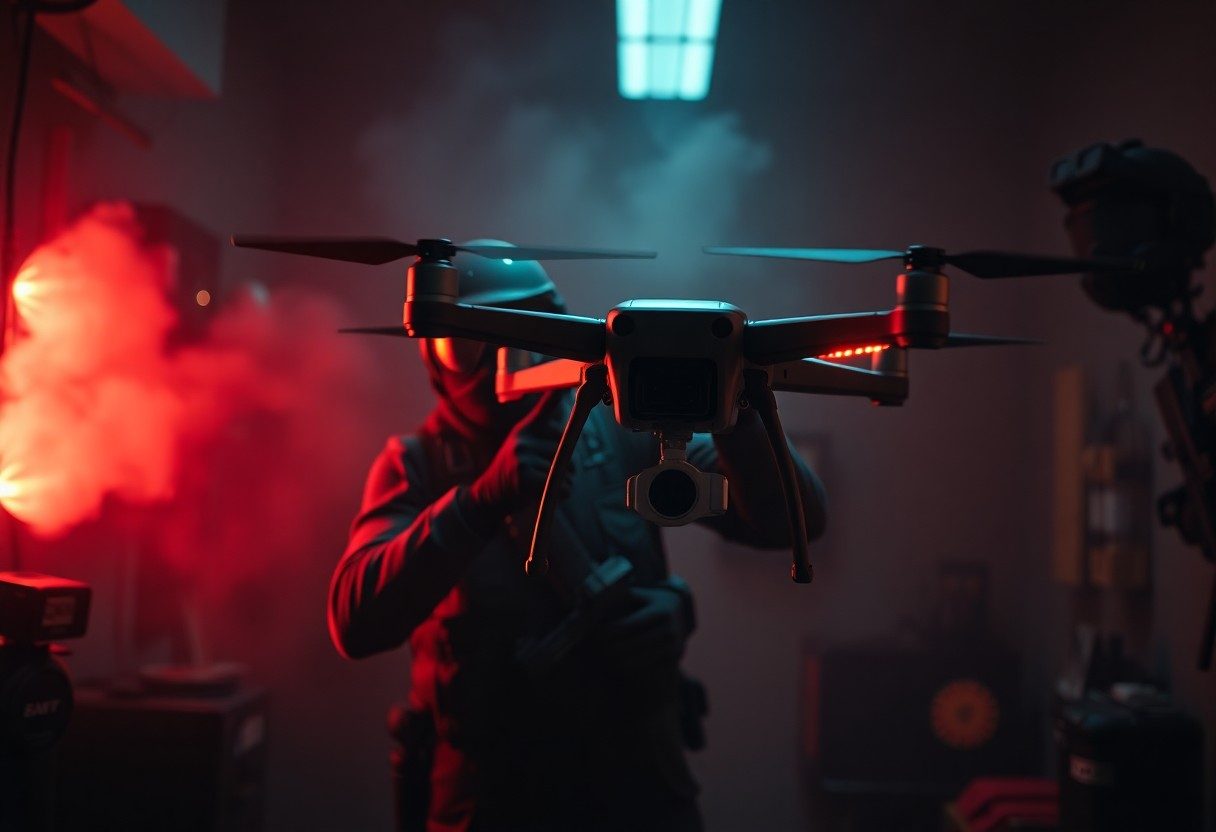
Using Drones for Utility
Now, the utility of drones in Rainbow Six Siege extends far beyond simple reconnaissance. They are an vital tool for gathering intel, disrupting enemy strategy, and providing vital support to your team during both the attack and defense phases. Utilizing your drone effectively can turn the tide of a match, so understanding how to deploy this gadget to its fullest potential is key to your success.
How to Maximize Your Drone’s Potential
You should take the time to familiarize yourself with the map layouts and common player movements. This knowledge allows you to pilot your drone more strategically, giving you an opportunity to scout high-traffic areas or corners where defenders might set up their defenses. Aim to navigate your drone quietly, avoiding detection from enemy players, and use the element of surprise to your advantage by relaying information to your teammates in real-time.
You can also utilize your drone to draw enemy fire. By sending your drone into a suspect area, you might attract attention from defenders, giving your team the opening they need to capitalize on a distraction. This tactic not only protects your teammates while they move but also provides them with valuable intel about enemy positions.
Intelligence Gathering Through Drones
For intelligence gathering, your drones can provide insights that are vital for planning your team’s approach. By checking for defender placements and observing roaming enemies, you can inform your teammates of the best entry points and highlight potential traps or defensive setups. The information you gather can be the difference between a successful push and a swift defeat.
It is effective to communicate with your teammates while using your drone. Providing clear and specific intel about the enemy’s position, operator abilities, and possible counters allows your team to tailor their strategy according to the situation. Sharing this knowledge not only enhances your team’s teamwork but also streamlines your overall attack plan.
Drone Usage during Planting/Defusing
An often-overlooked aspect of drone utility is their role during the critical moments of planting or defusing the bomb. When your team is preparing to plant, sending a drone ahead can ensure that the area is clear of defenders and help to secure the planting site. This foresight allows your team to focus on executing the plan instead of worrying about being ambushed during the vulnerable moments of the operation.
A well-timed drone scan can also save your teammates from unnecessary losses while they are busy planting or defusing. If your drone reveals an enemy trying to flank, you can alert your teammates so they can reposition, or even take out the enemy before they can affect the outcome of the round. Utilizing drones during these critical phases can significantly bolster your team’s chances of success.
Countering Opponent Gadgets
Many players underestimate the importance of countering enemy gadgets in Rainbow Six Siege. Understanding and neutralizing your opponent’s utility not only helps to tip the balance in your favor but also allows you to control the flow of each round. To effectively counter gadgets, it is important to identify the types of utility your opponents are deploying and how they may impact your strategy during the match.
Identifying Enemy Utility
Even the best-laid strategies can fall apart if you fail to recognize enemy gadgets. Pay attention to the operators being selected on the opposing team; this will give you crucial hints about what kinds of gadgets they might employ. For example, if you spot a Jäger, you have to be wary of throwables. Having a good understanding of the enemy lineup allows you to better prepare your utility to counter theirs.
Furthermore, audio cues can also help you identify enemy gadgets. Sounds like the *“Breach Charge”* or the *“Trap”* going off can alert you to certain threats, enabling you to adjust your approach accordingly. Use these insights to devise a plan that disrupts their setup, adapting your playstyle and equipment choices based on the gadgets they have deployed.
Strategies for Neutralizing Enemy Gadgets
Clearly, there are multiple strategies you can utilize to neutralize enemy gadgets effectively. One approach involves using operators armed with utilities designed for gadget removal, such as Thatcher and his EMP grenades. These grenades can disable electronic devices, giving your team a clear path to execute their plans. Additionally, using drones to spot and bait traps can allow you to minimize the impact of enemies’ defensive setups and gather vital intel.
Countering gadgets goes beyond just using operators designated for utility neutralization. You can also employ the right tools and tactics to help your team navigate through maps while avoiding traps and explosives. For instance, employing a soft breach on a wall with an impact grenade can draw the attention of defenders, revealing their gadgets in the process.
Teamwork in Countering Utility Threats
Utility teamwork is important when facing enemy gadgets. Always communicate with your teammates to ensure you’re maximizing the use of your combined capabilities. Each operator has unique strengths, and by coordinating your gadget removal, you’ll create openings for pushes and plant attempts. You should not go in solo; instead, work as a unit to take out enemy gadgets methodically.
Gadgets like the *“Maestro’s Evil Eye”* or *“Bandit’s Shock Wire”* can cause significant difficulties during your assault if left unchecked. Therefore, having a teammate focus on disabling these threats while others gather intel and provide cover can be an effective strategy. By leveraging your team’s strengths and communicating honestly, you’ll be able to neutralize enemy utility threats far more effectively than by going in alone.
Optimizing Map Knowledge for Utility
To effectively use your gadgets in Rainbow Six Siege, it is crucial to have a comprehensive understanding of the maps you’ll be playing on. This knowledge allows you to deploy your utility in ways that will maximize its effectiveness and allow your team to capitalize on the strategic advantages it provides. From reinforcing walls to throwing gadgets, knowing the map layout can significantly impact your gameplay and team success.
Understanding Map Layout for Utility Deployment
Some players may overlook the importance of familiarizing themselves with the intricate details of each map. The layout includes not just the general space but also the various entry points, sight lines, and destructible surfaces. By mastering the map’s architecture, you can better predict enemy movements, deploy your gadgets in optimal locations, and create choke points that will obstruct or deter your opponents effectively.
Identifying Key Areas for Gadget Usage
Understanding where to place your utility can make a world of difference in your game strategy. Certain areas on the map serve as hotspots for engagements or objectives, making them prime spots for gadget deployment. For instance, you may find that planting Smoke Grenades by doorways or utilizing Claymores near stairs can catch unsuspecting foes off guard. Utilizing your gadgets in well-trafficked areas not only enhances their effectiveness but also increases your team’s chance of success.
This is where your map knowledge truly comes into play. Analyze which rooms are commonly fought over or which pathways are frequently traversed. By identifying these key areas, you can anticipate enemy behavior and deploy your gadgets accordingly, ensuring that they have the maximum impact on the match. Always keep in mind that the right gadget in the right place at the right time can turn the tide of a round.
Adapting Utility Strategies to Different Maps
Deployment of your utility in Rainbow Six Siege is not one-size-fits-all; it requires you to adapt your strategies based on the specific map you are playing. Each map presents unique challenges and opportunities, so being flexible and ready to modify your approach is important. For example, if you’re playing on a map with numerous vertical elements, utilizing verticality with your gadgets can create unexpected angles for your enemies and surprise your opponents.
The ability to adapt your utility strategies will not only enhance your effectiveness but also elevate your team’s overall performance. Make it a habit to review different maps in the pre-match phase, considering how your gadgets can be used differently based on the environment. This foresight will ensure that you’re not just relying on preferred tactics but are also responsive to the unique aspects that each map brings to the table.
Final Words
From above, it’s clear that mastering gadget usage in Rainbow Six Siege significantly enhances your ability to make an impact in each game. Each operator comes equipped with unique gadgets that can change the tide of a round when used effectively. Your understanding of how to deploy these tools strategically, whether it’s setting traps, creating openings, or gathering intel, can set you apart from the competition. Always assess the match dynamics and adapt your utility use to the current situation, ensuring you maximize its effectiveness while minimizing risks.
Additionally, communication and teamwork play a vital role in how your utility is perceived and utilized within the squad. Sharing your plans with teammates will not only streamline your strategies but also help in capitalizing on the advantages your gadgets provide. The ability to think ahead and foresee how your gadgets can pivot the round to your favor separates average players from the exceptional ones. By continually refining your skills and understanding the nuances of each gadget, you elevate both your performance and that of your team, making every round a potential victory.
Q: What are some effective strategies for using drones in Rainbow Six Siege?
A: Drones are imperative for gathering intel before and during an assault. Utilize them to scout out enemy positions and call out information to your teammates. Make sure to control your drone cautiously, keeping it low to avoid detection. Use the first-person view to identify key areas, but don’t forget to keep in mind the noise your drone makes—the closer you are to enemies, the more careful you should be. Always recharge your drones before the round starts to maximize their availability during the match.
Q: How can I maximize the usage of breaching charges effectively?
A: Breaching charges are great for creating new sightlines and entry points, but timing is key. Position yourself close to reinforced walls without exposing yourself to enemy fire. Communicate with your team when you plan to breach; this ensures they can cover you and take advantage of the distraction. Use breaching charges in combination with utility like flashbangs or smoke grenades to obscure the enemy’s vision and create an opportunity for you and your team to enter safely.
Q: What role do environmental gadgets play in manipulating the map dynamics?
A: Environmental gadgets like barbed wire, traps, and deployable shields can shape team strategies and alter the flow of a round. For example, placing barbed wire in choke points slows down enemies, allowing you to anticipate their movement. Similarly, using traps like Kapkan’s or Lesion’s gadgets can deter or damage foes, forcing them to approach cautiously. Always consider the layout of the map and position your gadgets in areas where enemies are likely to engage to maximize their effectiveness. Collaboration with teammates to coordinate gadget placement can lead to a more formidable defense.
