

Over the course of a match, disciplined high-ground defence dictates comeback potential by denying space, controlling vision, and forcing opponents into unfavorable engagements; proper use of fortification, wave management, buybacks and smoke-aware positioning turns base sieges into opportunities for well-timed counterattacks, enabling teams to convert defensive resilience into coordinated initiation or split-push windows that swing momentum back in their favor.
Understanding High-Ground Defense
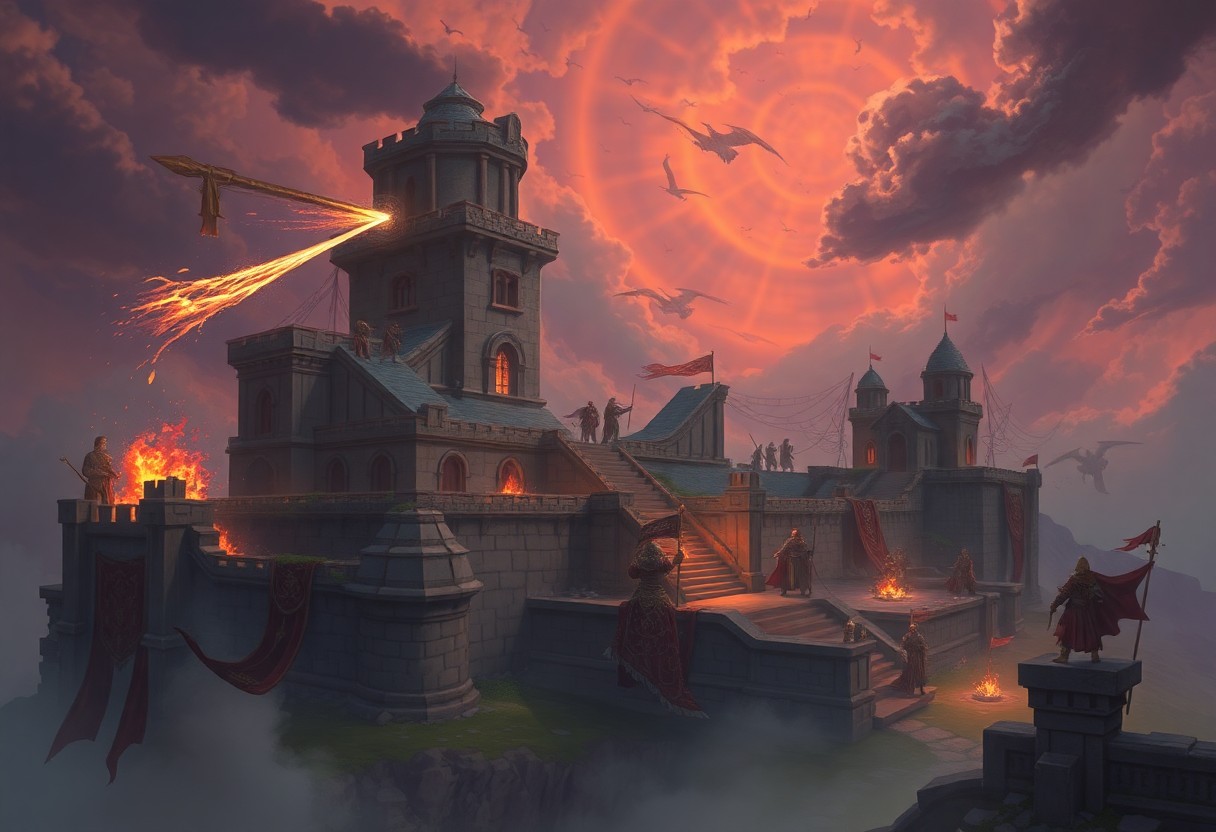
Definition of High-Ground Defense
High-ground defence means holding your base elevation and structures while the enemy assaults upward, using vision, building HP, Glyph, buybacks and hero cooldowns to turn sieges into stalls or counters; it’s a mix of terrain advantage, time management and resource conservation aimed at turning a 5v5 base fight into opportunities for enemy mistakes or objective trades.
Importance in Dota 2 Gameplay
Successful high-ground defence often buys 30-90 seconds of critical time that lets teams recover gold, reset buybacks, or contest objectives like Roshan; in practice one well-timed buyback or a single defensive ultimate can flip a near-certain loss into a teamfight win and a full comeback.
Specifically, delaying a push by 45 seconds can enable a respawn, allow key items (BKB, Blink, Aghanim) to be purchased, or let supports stack and pull, and at pro level teams convert those windows into map control-heroes with wide-area control (Winter Wyvern, Keeper of the Light) or survivability (Bristleback, Timbersaw) excel at turning stall time into decisive counter-engagements.
Historical Context of High-Ground Strategies
High-ground defence evolved from static tower turtling to dynamic stalling after major patches like 7.00 shifted emphasis to objectives and mobility; pro metas began favoring heroes and itemization that extend defence windows, while coordinated use of buybacks and Glyph became a standardized comeback tool.
Over recent years teams have refined staged defence patterns-wave-clearing priority, baiting glyph usage, and forcing split-push counters-so that defending is less about pure survivability and more about engineered time trades; this tactical shift is visible in tournament games where disciplined stalls turned into counter-pushes and full map control swings.
Key Heroes for High-Ground Defense
Defensive Supports
Dazzle, Oracle, and Winter Wyvern dominate defensive saves: Shallow Grave and False Promise absorb fatal bursts, Cold Embrace negates physical damage and heals, while Jakiro and Snapfire provide consistent zoning and building-slow through Liquid Fire and Mortimer Kisses. These supports force attackers to overcommit or waste durations, turning a single initiation into a stalled siege or a counter-kill when paired with a reliable frontliner.
Durable Offlaners
Tidehunter, Mars, Underlord and Centaur excel at stalling sieges with big AoE ultimates and high tankiness; Ravage and Arena can interrupt channeled combo attempts, Underlord clears creep waves and forces positional mistakes, and Centaur’s bulk + bodyblock denies approach angles, giving supports time to heal or reset the fight.
Timing and itemization magnify their impact: Tide uses Ravage to cancel channel spells and buy back windows, Mars positions Arena to split the enemy into chokepoints, Underlord controls wave equilibrium to deny creep pressure, and Centaur pairs Vanguard/Greaves or Crimson to absorb repeated battering. Coordinate cooldowns-stacking a Ravage or Arena with a Dazzle grave or Winter’s Cold Embrace turns a multi-hero explore a failed 5v5.
Utility Heroes
Keeper of the Light, Rubick, Snapfire and Phoenix bring non-linear value: KotL recalls and massive Illuminate waveclear, Rubick converts enemy ultimates into your weapons, Snapfire supplies long-range siege denial and burst with Mortimer Kisses, and Phoenix’s Supernova forces risky dives or forces glyphs and buybacks.
Deploy these utilities to reshape tempo: KotL’s Chakra and Recall reposition key defenders between lanes, Rubick must target and steal single-game-changing spells like Ravage or Chronosphere, Snapfire times Kisses to punish clumped attackers from high ground, and Phoenix times Supernova behind frontline cover to bait mispositioned initiations-items like Aghanim’s Scepter on Snapfire or Blink on Rubick amplify these plays.
Key Combinations and Synergies
High-impact pairings include Dark Seer + Tidehunter (vacuum into Ravage), Mars + Snapfire (Arena isolates; Kisses punish), and Winter Wyvern + Dazzle (cold save windows plus shallow-grave follow-up). These sets create layered denial: zone control, hard-disable windows, and emergency sustain that force siege attempts to fail or become trade-inefficient for the attackers.
Execute combinations with sequence discipline: initiate with zoning tools (Vacuum, Arena, Pit) to compress enemy approach, follow immediately with hard CC (Ravage, Stampede stun follow-ups) and then apply saves (False Promise/Shallow Grave) to preserve key cores. Use buybacks and glyph timing to convert successful defenses into counterpushes-pro games often hinge on chaining one clutch ultimate into a full base reset when these synergies are cleanly executed.
Analyzing How High-Ground Defense Works
Geographic Advantages
Terrain around base high ground funnels attackers into 1-2 narrow ramps and choke points, amplifying area stuns and tower focus fire; defenders exploit elevation for shorter pathing to fountain and quicker rotations, while siege damage is mitigated by tower line-of-sight and building placement, turning a 5v5 into a more favorable 3-4v5 when attackers are forced into predictable approach corridors.
Vision Control and Map Awareness
Placing Observer and Sentry wards on cliffs, behind trees and at ramp entrances secures 6-minute vision windows and early warning of rotations, allowing defenders to stall, set traps, or force a buyback; a single well-placed ward can convert an incoming 5-man push into a failed siege by enabling timely ultimates and target isolation.
More detailed coordination includes gem timing, deward sweeps and scan usage: defenders should refresh vision before key cooldowns expire and deny enemy vision to prevent smoke approaches; practical examples include holding a sentry to contest rune-side cliffs or using a gem to maintain continuous sight inside the base during the 30-45 minute power spike window.
Timing and Execution of Defense Tactics
Effective defense blends buyback economy, ultimate cooldown management and creep-wave timing-waiting for enemy siege creep stacks or forcing a push during a 20-40 second window when multiple ultimates are available shifts odds dramatically; coordinated stuns and tower-damage focus typically turn prolonged sieges into attrition battles favoring defenders.
Execution detail: stagger buybacks to avoid a simultaneous economy collapse, chain-disable initiations around key spells (Black Hole, Chronosphere, Ravage) and use Fortify to reset siege tempo; professional games often show successful defenses when teams bait a commit, expend enemy ultimates, then punish with a 2-3 hero counter-initiation while creeps pressure the opposite lane.
Comeback Scenarios through High-Ground Defense
Case Studies of Notable Comebacks
Several pro-level matches demonstrate how disciplined high-ground defense converted losing positions into wins: sustained base holds forced opponents into overextensions, enabled Roshan steals, or reset item timings. Below are quantified case studies highlighting duration of defense, gold deficits overturned, and decisive objectives that followed.
- Case 1 – Pro series: defended high ground for 6:12 while down 9,800 gold; saved 2 melee barracks, secured Roshan at 28:40, then won a 5v5 fight to take mid and close the game in 3:20.
- Case 2 – DPC match: sustained four consecutive base defenses over 10 minutes, reduced enemy tower gold income by 1,350, forced a 37-minute high-ground teamfight resulting in a 2-for-3 trade and a counter-push that reclaimed a 7k gold deficit.
- Case 3 – Regional final: a 4-minute hold with three successful glyph uses and two buyback plays denied megas; opponent lost 3 key ultimates in failed sieges, enabling a 2-minute transition to Rosh and a 12k swing over the next 8 minutes.
Psychological Impact on Opponents
Failing to break a defended base repeatedly amplifies opponent frustration and risk-taking: after two unsuccessful sieges teams often initiate 30-50% more split engages or forced smoke plays within the following five minutes, increasing coordination errors and mispositioning that defenders can exploit.
Momentum shifts as pressure mounts-opponents begin to overcommit items like Aegis-dependent dive timing or blow major cooldowns (Refresher, Black King Bar) earlier; statistical replay reviews show a 12-20% uptick in missed skillshots and poor target focus during the immediate post-failure window.
Risk Management and Decision Making
Effective defense is as much about calculated risk as pure survival: teams that prioritize objective timing (Roshan at +30s after repel) and conserve buybacks reduce variance and improve comeback probability. Quantitatively, teams that saved at least one buyback and forced Roshan within 3 minutes of a failed siege won roughly 60-70% of those comeback sequences.
Decision trees matter-opponents’ error rates rise when they ignore vision, siege creep equilibrium, or glyph cooldown windows. For example, committing a high-ground push without ward control or without a secondary initiation tool increases failure chance by an estimated 25%, turning a small advantage into a swing that defenders can capitalize on.
Common Mistakes During High-Ground Defense
Overcommitment of Resources
Sending 2-4 heroes to hold one lane while the enemy secures Roshan or opens the opposite lane often backfires: you lose map control, two towers, and create a 30-90 second window where buybacks are forced. For example, committing three heroes to defend top at 35 minutes allowed the attackers to take Roshan and then break mid within 60 seconds because nobody was contesting map vision or secondary lanes.
Poor Communication Among Team Members
Failing to call enemy cooldowns, missing smoke pings, or not announcing buyback status leads to split decisions and 2-3 hero pickoffs that turn a stable defense into a scramble. When teammates don’t state Aegis timings or whether they can contest Roshan, coordinated defenses collapse quickly and high-ground holds become chaotic rather than planned.
More specifically, assign a single shot-caller or explicit roles: one player tracks enemy item timers, another manages vision and wards, and one handles buyback calls. Use quick pings to mark contested objectives and announce “no buyback” or “BKB ready” so the team avoids engaging 5v3s; a single missed call about a 5-minute buyback cooldown or an untracked Aegis (5-minute duration) often costs the base within a minute of a failed contest.
Ignoring Map Objectives
Tunnel vision on defending the lane while leaving Roshan, shrines, or Tier-2 towers uncontested hands the attackers tempo and Aegis advantages. Roshan respawns in 8-11 minutes and granting him uncontested access at 25-40 minutes often results in a swift, renewed siege with the enemy sieging high ground within 30-90 seconds of taking Roshan.
Prioritize placing Observer/Warding vision around Roshan, contesting the pit with 3-5 heroes when necessary, and denying enemy shrine control to reduce their sustain during sieges. Take a Tier-2 or force a fight in the enemy jungle to relieve pressure; giving the attacker free Roshan or lane control lets them chain objectives and collapse a high-ground defense in under two minutes if defenders lack vision and buybacks.
Strategies for Overcoming Strong High-Ground Defenses
Counter-Push Mechanics
Counter-push mechanics center on efficient waveclear, objective trading and forcing resource use. Heroes with reliable AoE (Leshrac, Luna, Earthshaker) and items like Maelstrom/Mjollnir clear waves fast; bait a Glyph (5-minute cooldown) or a buyback, then immediately pressure another lane or Roshan. Rotate vision and use siege creeps or summoned units to force defenders into awkward, time-consuming decisions.
Split-Pushing as a Tactic
Split-pushing stretches defenders: Nature’s Prophet, Tinker, Lycan and illusion-based cores force multiple rotations and costly TP responses, typically burning 20-60 seconds per reaction. Focus on maintaining creep equilibrium, safe wards, and TP readiness so rotations either concede towers or let your team take Roshan or objectives elsewhere.
Execute split-pushes by pairing a fast pusher (Treants, Necro units, or Boots of Travel hero) with a teammate who can punish mis-rotations; for example, NP top with treants while your mid waits to collapse if two players rotate. Forcing a second Glyph or a buyback compounds the advantage-two forced rotations can yield 40-120 seconds of map control-so alternate lanes, stall with illusions, and time pushes around Roshan or power-spike item timings.
Itemization and Build Considerations
Item choices should enable sustained pressure and survivability: Force Staff/Blink for repositioning, Maelstrom/Mjollnir for faster waveclear, Desolator or Solar Crest to increase tower damage, and BKB or Aeon Disk to survive burst during a high-ground attempt. Supports should prioritize Greaves/Pipe and vision items to extend sieges and deny safe rotations.
Practical builds prioritize tempo: a Maelstrom accelerates creep clear and speeds split-push windows, while Blink lets a core avoid disables and punish overcommitments. If defenders rely on nukes, secure a timely BKB to commit to a tower; against heavy physical defense, armor-reduction and sustained DPS win sieges. Support item sequencing-Mek/Greaves, Observer/Wards and Dust/Sentries-shifts the defender’s resource balance and can force early Glyphs or reveal backdoor opportunities.
Summing up
Summing up, effective high-ground defense in Dota 2 dictates comeback potential by forcing enemy overextensions, leveraging vision control, siege management, and optimal hero positioning; calculated buybacks, cooldown windows, and coordinated team fight responses turn stalled defenses into counterpushes, allowing disciplined teams to reclaim map control and objective momentum even from disadvantaged positions.
FAQ
Q: How does holding high ground change the tempo and create comeback opportunities in Dota 2?
A: High-ground defense compresses the game tempo by forcing attackers to commit hiatuses for vision, siege items and buybacks, which buys time for the defending team to farm, stack jungle, or time key respawns and ultimates. The elevation and chokepoints favor area denial and long-range harassment, making it harder for the attacker to coordinate clean engagements without losing heroes or key cooldowns. Successful defense can turn a failed siege into a staggered respawn advantage, a well-timed Roshan attempt, or a swing in net worth as attackers expend buybacks and consumables. Proper wave management and denying siege creep value during sieges magnify this effect, allowing defenders to recover map control and initiate counter-pushes when the enemy lacks resources.
Q: Which hero types and items most effectively support high-ground defense and enable comebacks?
A: Heroes that excel at area control, waveclear, sustain and long-range harassment are most valuable: disablers (e.g., multi-target stuns), defensive initiators that can stall fights, supports with sustain and save tools, and nukers who can clear siege creeps quickly. Heroes with globals or short travel-time plays allow split-farming while keeping base defended. Key items include team-sustain and survivability (Mek/Guardian Greaves, Pipe, Crimson), disengage and save tools (Force Staff, Glimmer Cape, Eul’s), and counter-siege items (Heaven’s Halberd on carries, Shiva’s Guard on tanks). Vision tools (wards, Sentry, Gem) and objective-control items (Aegis timing, Roshan readiness) also shift advantage: good vision prevents surprise flank sieges and secures windows to reclaim lanes safely.
Q: What attacker mistakes commonly cause high-ground defenses to fail, and how can defenders exploit those errors to mount a comeback?
A: Common attacker errors include overcommitting without vision, baiting into defensive ultimates, mismanaging buybacks, and sequentially wasting key cooldowns on crests rather than objectives. Defenders can exploit these by staying disciplined: hold the high ground until attackers split or expend resources, use saved disables and heals to punish overextensions, and prioritize pick-offs on isolated heroes to turn numbers. If attackers lose buybacks or key ultimates, defenders should shift from pure defense to controlled aggression-clear waves, secure Roshan if safe, and take compact objectives while the enemy is respawning. Maintaining calm macro decisions-stacking jungle, shifting lanes, and timing smoke plays-lets a well-defended base translate a successful stand into a full-scale comeback.


