

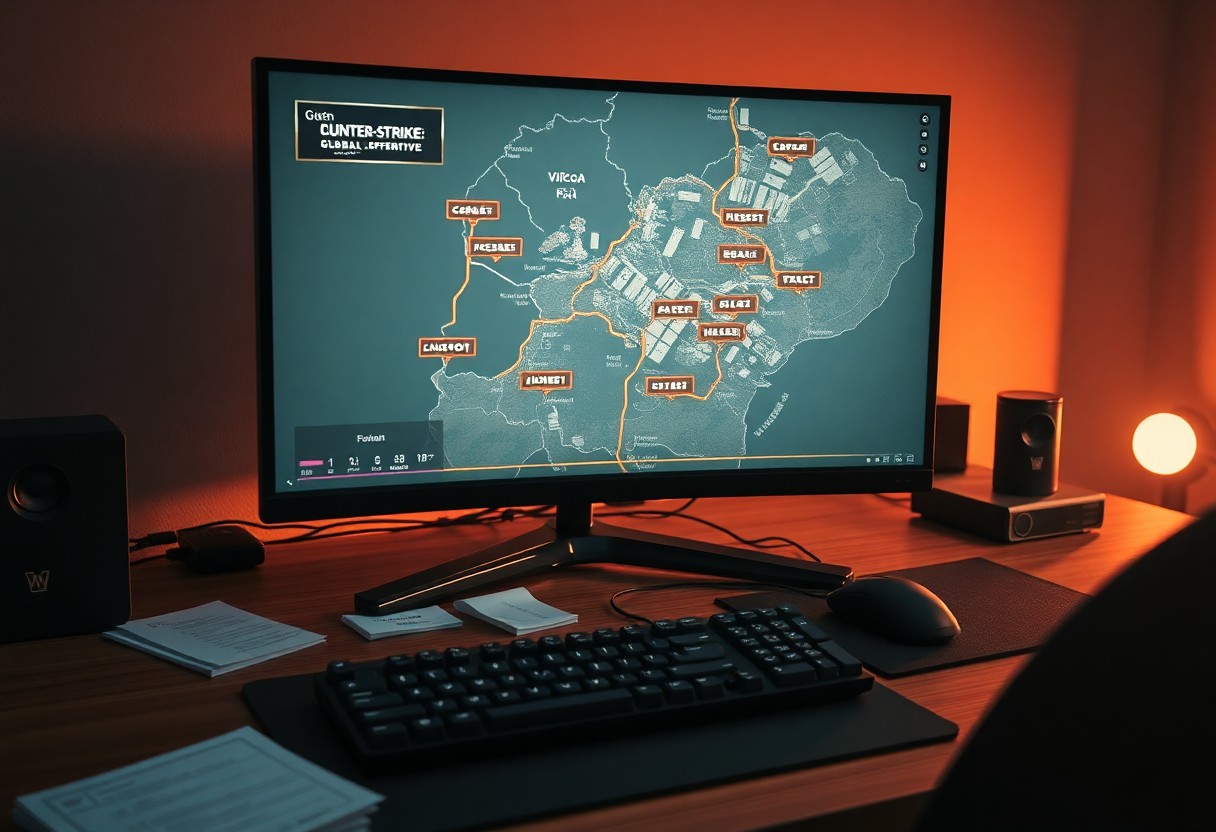
Map callouts are imperative for effective communication and teamwork in Counter-Strike: Global Offensive. Understanding the various locations and their designations on each map enhances your strategic gameplay, allowing you to relay information swiftly and accurately to your teammates. This blog post will guide you through the key map callouts for popular CS:GO maps and provide strategic insights to improve your overall performance. By mastering these elements, you will significantly elevate your game and contribute more effectively to your team’s success.
Understanding Map Callouts
Clearly, understanding map callouts is necessary when honing your skills in Counter-Strike: Global Offensive. Mastering callouts not only aids in improving your gameplay but also significantly enhances your team’s coordination and efficiency during matches. Navigating maps like Dust II or Mirage becomes infinitely easier when you can accurately communicate your position and the location of opponents or objectives. Therefore, taking the time to familiarize yourself with map callouts can elevate your overall gaming experience and performance.
Importance of Communication in CS:GO
Importance of communication in CS:GO cannot be overstated. In a fast-paced environment where split-second decisions can mean the difference between victory and defeat, being able to convey information clearly and efficiently is vital. Effective communication allows your team to strategize, execute plans, and adapt to changing situations on-the-fly, ensuring a higher level of teamwork and understanding among players.
Utilizing accurate callouts helps minimize confusion, enabling your teammates to quickly grasp the state of the game. When you convey necessary information about enemy positions or events unfolding on the map, you facilitate better strategic planning and increase the chances of a successful outcome. This level of awareness fosters an environment where you and your team can capitalize on opportunities and counter threats effectively.
Common Terminology Used in Callouts
Across CS:GO’s competitive scene, there are standardized terminologies for specific areas on each map. Familiarizing yourself with these common callouts is paramount for effective communication with your team. While each map has its own unique callouts, many terms have become widely recognized, ensuring that players can quickly relay important information during intense gameplay. Understanding and implementing these callouts into your vocabulary will help you navigate the battlefield more efficiently.
Callouts typically consist of single words or short phrases that denote particular locations, making them easy to remember and employ in conversation. For example, terms like “A site,” “B site,” “Mid,” or “Tickets” are prevalent across maps like Mirage. Having a strong grasp of common callouts allows you to maintain a seamless flow of information with your teammates, leading to more strategic gameplay.
Map Layout and Design
Design plays an necessary role in how you approach each map in CS:GO. Every map is meticulously crafted with strategic locations, chokepoints, and varying elevation levels that influence the tactics you employ. Understanding the layout enables you to select the best routes for attack or defense, as well as identify vantage points that provide a tactical advantage. Recognizing how the map is designed can drastically improve your gameplay and decision-making during matches.
Hence, appreciating the nuances in map layouts, including bomb sites, cover spots, and common pathways, allows you to navigate effectively and make advantageous decisions in real time. Knowing where enemy players are likely to be and what paths they might take gives you a clearer picture of the battlefield, enabling you to adjust your strategies based on the specific dynamics of the map being played. This knowledge ultimately helps you become a more formidable player in CS:GO.
Dust II: The Iconic Map
Now, Dust II stands out as one of the most recognizable maps in Counter-Strike: Global Offensive, frequently associated with competitive play and casual fun alike. Its design combines tight corridors, open spaces, and verticality, allowing for a wide array of strategic plays and tactical maneuvering. Whether you’re a seasoned player or new to the game, understanding the layout and callouts of this famous map can significantly improve your performance and teamwork.
Key Callouts for Dust II
Behind each corner and area on Dust II lies a term that can streamline communication with your teammates. Familiarizing yourself with imperative callouts such as “Long A,” “Catwalk,” “B Site,” and “Mid” will help you convey information efficiently. For instance, when you report enemy locations or strategize your next move, using these callouts ensures everyone is on the same page, enhancing collaborative efforts during rounds.
Moreover, recognizing the various hiding spots and vantage points—like “A Platform” and “Window”—can be beneficial for both offensive and defensive maneuvers. Utilizing these locations wisely can hide your intentions from the enemy or allow you to surprise them with well-timed ambushes. Keeping your callouts precise and consistent will reinforce your team’s coordination and strategy.
Strategic Approaches for Terrorists
Strategic movement is key to successfully executing an attack on Dust II as a terrorist. Often, you’ll want to focus on controlling areas like “Mid” and “Long A” to gain map control, which allows you to dictate the pace of the game. Fast-paced rushes through “Long” can catch defenders off guard, while slower, more tactical plays through the “B Tunnels” can lead to successful site takes.
It’s also beneficial to employ deceptive tactics, such as faking pressure on one site while executing at the other. Coordination in executing smokes and flashes to block line-of-sight can create safe pathways, allowing for smoother advances. Your success as a Terrorist hinges not only on quick reflexes but also on understanding when to engage and when to withdraw, adjusting your strategy dynamically based on how the defending team reacts.
Defensive Strategies for Counter-Terrorists
Above all, positioning and map awareness are fundamental to successfully holding sites as a Counter-Terrorist on Dust II. Placing your team strategically across critical points such as “A Site,” “B Site,” and “Mid” is imperative. Utilizing players in high-ground positions, like “Goose” on A Site, can give you the advantage of surprise and superior sightlines against pushing terrorists.
Iconic defensive strategies involve cross-firing positions, where teammates support each other from various angles to effectively shut down enemy pushes. Maintaining communication and sharing information about enemy movements can dramatically increase your chances of securing victories. Always adapt your positions based on how the match progresses, ensuring that no single area is poorly defended. A strong defense is about foresight and flexibility, allowing you to adjust your tactics to counter the terrorists’ advances successfully.
Inferno: A Tactical Battlefield
Despite being a classic map in Counter-Strike: Global Offensive, Inferno offers a unique blend of tight chokepoints and open spaces that demand strategic thinking and excellent teamwork. Your understanding of the layout and your ability to communicate effectively with your teammates can significantly tilt the odds in your favor. This map requires players to be versatile, adapting their strategies based on the ever-changing dynamics of the match. Knowledge of imperative callouts and effective strategies for both attacking and defending can make all the difference in securing a victory.
Essential Callouts for Inferno
Behind every successful push or defense on Inferno lies a shared understanding of the map’s callouts. Effective communication starts with knowing where your teammates are, where the enemy approaches from, and where critical areas of interest are located. Establishing specific callouts such as “Banana,” “A Site,” and “Library” helps maintain clarity and fosters quick decision-making during frantic moments. Utilizing these callouts correctly can provide your team with vital information to execute your plans efficiently.
In addition to the main locations, you should be familiar with secondary callouts like “Nades,” “Coffins,” and “Archway.” Each of these locations plays an integral role in both defending and attacking strategies. By being proactive in your communication about enemy movements—whether you’re rotating from B to A or planning a push into Pit—you can help your team stay one step ahead of the competition.
Attack Strategies for Bomb Planting
An effective attack strategy on Inferno typically revolves around the bombsite you aim to control. If you are pushing A Site, you will want to coordinate your team to ensure that you take control of critical positions such as Balcony and Site itself. Use utility like smokes and flashbangs to cover enemies hiding in strategic spots like the A Site and Library, allowing you to secure a clear path for planting the bomb. Meanwhile, teamwork and communication can help negate any decisive counter-attacks from defensive players.
Considering the inherent unit dynamics on this map, splitting your team between A and B can create versatile options for bomb placement. By applying pressure on both sites, you force the defending team to spread out, making it harder for them to mount a united defense. Quick rotations can give them the choice to defend the compromised side while leaving the other open for a potential bomb plant, leading to greater tactical advantage.
Defensive Positions and Rotations
For defenders on Inferno, positioning and rotations play a vital role in thwarting your opponent’s advances. Holding areas like B Site and the choke point at Banana requires good coordination and proper use of utility to fend off enemy pushes. As you stand guard at these locations, being aware of your teammates’ positions allows for more effective support during engagements. Communication about whether to fall back or hold your ground can drastically influence the outcome of an attack.
Inferno allows for strategic rotations, where defenders can quickly reposition themselves based on the pressure they sense from their opponents. If you find that the attack is firmly focused on one site, you can rotate to reinforce that area. Making quick decisions regarding whether to push back or regroup with your teammates is imperative under pressure, and being in tune with your team’s communication will make those decisions smoother.
Inferno’s map design demands not only skills in gunplay but also a thorough understanding of both attacking and defensive strategies. Familiarizing yourself with imperative callouts will streamline communication, while mastering your positioning and rotation tactics enables you to defend effectively and counter any adversary attempts to crush your defenses.
Mirage: Mid Control and Its Importance
For players looking to dominate the Mirage map in Counter-Strike: Global Offensive, controlling mid is an important part of your strategy. Mid control allows you to exert influence over the entire map, enabling your team to dictate the pace of the game. By controlling mid, you can effectively rotate between A and B sites, set up traps for your opponents, and secure valuable map information. Knowing the callouts and strategies involving mid will enhance your gameplay and improve your team’s performance.
Callouts Unique to Mirage
After you familiarize yourself with the unique callouts on Mirage, you will find it easier to communicate effectively with your teammates. Some important callouts include “Top Mid,” “Connector,” and “Catwalk.” These spots not only indicate player locations but provide strategic points for both attacking and defending teams. Using accurate terminology when discussing strategies will enhance your team’s coordination, especially when trying to gain or maintain control of mid.
Another critical callout to keep in mind is “Window,” which overlooks mid and provides opportunities for players to pressure or flank opponents. Occupying positions such as “Jungle” and “Tetris” can also grant you leverage in engagements, allowing you to quickly switch between attacking and defending without losing sight of your enemies or objectives. Mastering these callouts will streamline your communication and support your mid control efforts.
Aggressive Plays for Terrorists
Importance of mid control for Terrorists cannot be overstated, especially when considering aggressive plays. By taking an early confrontational stance in mid, you can create significant disruptions for the Counter-Terrorists. Utilizing smokes and flashes to blind or slow down opponents can give you the upper hand. By pushing aggressively through mid, you not only deny CTs map control but also put pressure on them, potentially forcing them into unfavorable positions.
Hence, determining the right moment to execute an aggressive mid push is key. You will want to coordinate with your teammates to ensure that you have sufficient support and to capitalize on your control. Always be prepared to rotate based on the situation; if your team secures mid early, use it to launch a concerted attack either toward A or B, capitalizing on the chaos your push may have created.
Holding A Site as Counter-Terrorists
Terrorists face a unique challenge when attempting to hold the A site as Counter-Terrorists. It’s important to effectively use utility such as grenades and molotovs to cover angles and flush out enemies attempting to encroach on your territory. Holding the A site requires good communication and smart positioning. Controlling A ramp and providing support from Ninja or Ticket can help you manage threats while also creating opportunities for retakes if needed.
Further, placing players in key positions will allow for a well-rounded defense. Assign one or two players to hold Jungle and Connector, making sure they can quickly access both A and mid. This flexibility allows you to adapt to the terrorists’ strategies and respond to their movements across the map. Taking control back from the opposing team demands teamwork and a solid grip on these positions, enhancing your chances of winning the round.
Train: Managing Long Sightlines
Unlike many maps in Counter-Strike: Global Offensive, Train presents players with a unique layout that incorporates extensive long sightlines. These sightlines can be both an advantage and a hindrance depending on how you navigate them. Understanding the map’s structure allows you to capitalize on your positioning while being mindful of enemy angles. Properly managing these long corridors and sightlines is important for effective engagement with opponents and can shift the tide of the game in your favor.
Critical Callouts for Train
Against the backdrop of long sightlines, having specific callouts is vital for effective communication with your team. Key areas on Train include Olof, Ivy, and the infamous B site bomb train. Familiarizing yourself with these callouts will ensure that you’re quickly relaying information and coordinating strategies with your teammates. For instance, if an enemy is spotted at Ivy, you can quickly warn your team that an approach to A might be imminent and prepare to counter it.
Moreover, knowing where to position yourself to gain the advantage in these sightlines matters significantly. Covering angles that lead into A site from the back of Train can mean the difference between life and death in a confrontation. When you and your team utilize these callouts effectively, you create a cohesive approach that can secure control of the map and facilitate successful engagements.
Approaches to Controlling the A Site
On Train, controlling the A site requires keen awareness of sightlines and cover points. You must prioritize taking advantage of areas such as Olof and the A bomb train itself. Positioning is key—understanding where to watch from and how to peek can greatly enhance your effectiveness. Additionally, the use of smokes and flashes can help create distractions, allowing you to challenge opponents with more favorable odds.
For instance, using smokes to block view from the Z-connector and flashes to blind opponents on the bomb train can provide you with the necessary openings to execute your approach. Coordinating your team’s movements to gather intel and push together is imperative for a successful take of the A site. You need to ensure that all entry points are covered, especially from the backside, where sneaky opponents might be lurking.
Retake Strategies for the B Site
Against a strong hold on the B site, retaking can be a daunting task, but it’s not impossible with the right strategies. Communicate clearly with your team to decide whether to commit to a retake or reposition. Utilize grenades such as smokes and molotovs to block vision and flush out opponents hunkered down in common spots like the bomb train or the upper platform. Being proactive is key—catching opponents off guard can provide the edge you need, but quick coordination and execution are vital during these moments.
Site retakes on B often involve a strategic split, where you send players to different angles to initiate a pincer movement. Coordinating your approach with well-timed utility not only makes the path clearer but also divides the enemy’s focus, increasing your chances of success. Always be proactive about intel; the more awareness you have of enemy positions, the better your retake will be.
Overpass: Water and Verticality
Many players often overlook the unique layout and dynamics of Overpass, especially how water and verticality play into the gameplay. The map features multiple levels, offering a blend of close-quarters engagement and long-range sightlines, especially around the A-site. With the water area creating additional layers for movement and concealment, controlling this space can be pivotal to your team’s success in either attacking or defending strategies.
Necessary Callouts for Overpass
After learning the fundamental gameplay mechanics, it’s imperative to familiarize yourself with the specific callouts that will serve your team well. Callouts such as “Bathroom,” ” connector,” and “Party” are vital for players to regularly communicate where enemies may be located or if they are pushing certain areas. Keep these locations clear in your mind; they will enable your squad to coordinate tactical moves and react swiftly to opponent advances.
The water area presents additional callouts. Terms like “Water,” “Long Water,” and “Short Water” help your teammates gauge enemy positions and movements. Make it a habit to practice these terms during matches so that your communication remains efficient and effective.
Strategies for Taking Control of A and B Sites
To successfully gain control of the A and B sites on Overpass, specific strategies can maximize your team’s effectiveness. On the A-site, gaining control of “A-site” and “Long” can allow your team to put pressure on the defending players, while utilizing the ‘Heaven’ area provides an elevated position for snipers or supporting players to cover pushes. Alternatively, on the B-site, focusing on “B site,” “Monster,” and “Short B” allows for quick entries and control of sightlines, especially if you launch your approach from the “Water” area.
Water serves as a critical location that creates unpredictable angles for your team and potential hiding spots for enemies. Use this area to surprise opponents; a well-timed push from “Water” can catch enemies off guard. Moreover, the verticality of the map allows you to exploit high-ground positions for tactical advantages such as spotting enemies or getting a better angle on opponents trying to plant or defuse the bomb.
Utilizing Utility Effectively
Necessary utility usage can define the outcome of your engagements on Overpass. Smoke grenades are particularly beneficial for blocking key sightlines, allowing your team to safely advance into advantageous positions. For example, a well-placed smoke at “Bank” or “Heaven” can provide an effective cover for a site take or counterattack. Molotovs and flashbangs are equally important, as they can clear common hiding spots and temporarily disorient opponents, leading to easier entries.
Utilizing utility is about positioning and timing. Make it a point to coordinate throws with your teammates to maximize effectiveness, whether it’s executing a swift push or retaking a site. Pay careful attention to how opponents react to your utility, and adjust your strategy accordingly to catch them off-guard, ensuring that your team can maintain control of the critical areas on Overpass.
Ancient: The Newest Map Strategies
All players looking to enhance their game in Counter-Strike: Global Offensive must familiarize themselves with the unique intricacies of the map Ancient. It’s vital to understand the layout and incorporate effective communication through callouts. This will not only help you navigate the map quickly, but also allow your team to coordinate strategies seamlessly. Each section of Ancient has its own designated area, commonly referred to by specific names such as “A site,” “B site,” “Temple,” and “Mid.” Knowing these callouts assists you in relaying information about enemy positions and coordinating your movements with teammates efficiently.
Understanding Callouts for Ancient
Understanding the callouts for Ancient is vital to developing successful strategies. By familiarizing yourself with each area of the map, you can enhance your communication during gameplay. For instance, if you spot an enemy near “A site,” you should confidently announce this to your team, allowing everyone to position themselves strategically. Additionally, understanding the geography of Ancient assists you in planning rotations and properly responding to enemy moves. Recognizing key locations such as “Jungle” and “B site” will enable you to secure wins more consistently.
Innovative Strategies for Attackers
Strategies for attackers on Ancient can vary greatly compared to other maps due to its distinct features. As an attacker, you should take advantage of the map’s verticality and cover options to create engagement opportunities with the opposing team. Flanking enemy positions through unexpected routes can catch defenders off guard, making it vital to utilize smart movement tactics. Initiating fights in areas like “Mid” can often create openings, allowing your team to pressure bomb sites effectively.
At all levels of play, coordination among attackers can significantly impact your success on Ancient. Softening up defensive players with utility before committing to a site can increase your odds of securing the right engagements. Make sure to communicate about your utility usage and strategize around crucial timings, enabling you to capitalize on the enemy’s vulnerabilities. Always have a plan for post-plant scenarios, as coordinating your retake will put you in a powerful position.
Defensive Coordination and Setups
Around your defensive setup, understanding how to position your team is equally important. Every section of Ancient presents different opportunities for defenders to hold their ground effectively. Establishing a good crossfire at “A site” can catch attackers off guard, while controlling “Mid” allows you to gather valuable intel on incoming pushes. Additionally, utilizing sneaky positions around the map can provide you with tactical advantages when engaging in firefights.
Consequently, ensuring that your team communicates clearly about enemy locations and potential threats becomes vital. Regularly updating your teammates about the status of various areas will empower you to adapt your strategy on the fly. Coordinate utility usage to delay enemy advances, and always be prepared to support your teammates during engagements. By mastering these defensive coordination techniques, you can fortify your team’s presence on Ancient and increase the likelihood of victory.
Vertigo: Skyscraper Strategies
After stepping onto the towering stage of Vertigo, you are presented with a uniquely vertical battleground where elevation changes can make or break your strategies. In such a dynamic environment, effective communication regarding map callouts is vital for orchestrating successful plays. Understanding these callouts will provide you with an advantage over your opponents and help your team coordinate movements throughout this skyscraper setting.
Map Callouts for Vertigo
Any successful operation on Vertigo hinges on your awareness of specific areas and effective communication within your team. Key locations such as “A Site,” “B Site,” and “Mid” dominate the conversation, but it’s vital to also note spots like “Ramps,” “Construction,” and “Elevator.” As you familiarize yourself with these callouts, you’ll find that timely updates on enemy sightings or decided plans become effortless, ultimately leading to more organized plays and reduced confusion during high-stakes situations.
Any dedicated player knows that reinforcing the names of alternative callouts, such as “Top Mid,” “Bottom Mid,” and “A Balcony,” can help maintain clarity. Knowing the layout not only allows you to position yourself better, but also enhances your ability to relay information to your teammates. When you’re under pressure, having an understanding of these areas will empower your team to make faster, more calculated decisions throughout the match.
Unique Strategic Play for Terrorists
Strategic movement on Vertigo is imperative for successful Terrorist plays, particularly because of the varied elevation and limited sight lines. Focusing your efforts on splitting the team either through “A Site” and “B Site” or taking control of key locations like “Ramps” can yield significant rewards. By utilizing smokes and flashes, you can blind Counter-Terrorists, allowing for easier access and control over vital areas.
Even subtle variations in strategy can greatly affect your success. For instance, using a considerable presence at “A Site” while simultaneously applying pressure on “B Site” can divert attention and force the Counter-Terrorists to reposition. This maneuver allows your team to exploit any gaps or weaknesses while maximizing firepower at the selected site. Stay agile and communicate effectively to adapt your approach as needed, ensuring that you keep the enemy guessing.
Counter-Terrorist Positioning Techniques
Between the various levels of Vertigo, Counter-Terrorist positioning is all about maximizing sight lines and minimizing vulnerability. The flexibility offered by the multiple elevation levels allows for dynamic reactions to Terrorist movements. As you take control of advantageous spots, such as “A Site” or “Ramps,” ensure that you establish crossfire opportunities with your teammates to deter attackers effectively.
Counter-Terrorist players should consider rotating between the vertical layers of Vertigo to catch the Terrorists off guard. For instance, playing from a higher vantage point can offer vital intel on incoming pushes, giving you a significant edge. Additionally, establishing communication between players located on different levels can provide coverage, allowing for coordinated strikes and effective defense against aggressive pushes.
Cache: The Nostalgic Favorite
To navigate the virtual battleground of Cache effectively, you must embrace the map’s layout and nuances that have been cherished by players throughout the years. Set in an industrial area with a blend of tight corners and open spaces, Cache offers opportunities for innovative strategies and teamwork. Being familiar with the map’s structure will give you a substantial advantage, allowing you to anticipate enemy movements and position yourself favorable for engagements.
Important Callouts for Cache
Beside understanding the major areas of Cache, important callouts will enable you and your team to communicate effectively. Designations like “A site”, “B site”, and “Mid” are fundamental, but areas such as “Toxic”, “Hai”, and “Checkers” can turn the tide of battle if used correctly. Make sure you’re on the same page with your teammates by clearly identifying these locations during gameplay. This shared language will facilitate better coordination when executing strategies and responding to enemy tactics.
Additionally, making use of callouts for less obvious spots such as “Boost” or “Squeaky” can help you sneak past your enemies or set devastating traps. Each callout serves as a part of your tactical arsenal, so implement them consistently in your matches to strengthen team synergy and enhance your communication on this nostalgic battlefield.
Offensive Strategies for Control
Among the different strategies you can utilize on Cache, taking control of key areas can greatly enhance your team’s chances of victory. Focusing on “Mid” can allow you to split the map effectively, forcing enemies to respond to pressure from multiple angles. By seizing control of “A Site” or “B Site,” you encourage your opponents to spread out, creating openings for teammates to exploit. Utilizing smokes and flashes effectively will help you gain that advantageous position without losing too many players in the process.
At the same time, coordinating your attacks with your team can create overwhelming force against the enemy. Timing your pushes and employing utility can disrupt the opponents’ strategies and allow for successful site takes. Don’t forget to shuffle roles among your teammates to keep the enemy on their toes and make it increasingly difficult for them to predict your movements.
Responding to Enemy Tactics
Between rounds, assessing how your foes are conducting their strategies allows you to adjust your approach accordingly. Understanding what tactics they are deploying—whether they are frequently pushing aggressive plays or holding back to defend—is paramount. You can develop counter-strategies that play off their weaknesses, such as utilizing flanking maneuvers if they tend to focus on one area of the map.
But if you find that the enemy team has an effective hold on a particular site or section of Cache, adaptability is key. Rotating your players or switching up your utility usage can change the game dynamics drastically. Observing patterns in their playstyle gives you insights that you can leverage, which keeps your strategy fluid and responsive throughout the match.
Training and Practicing Map Callouts
Once again, honing your skills in Counter-Strike: Global Offensive isn’t simply about shooting and movement; it’s equally about mastering communication through effective map callouts. Clear and concise callouts can make a world of difference in your battlefield awareness and teamwork. Practicing these callouts not only helps you convey critical information to your teammates but also allows you to respond to enemy movements with precision, elevating your overall gameplay experience.
Methods for Improving Communication
To enhance your communication skills in CS:GO, you should focus on repetitive practice and collaboration with others. Regularly engaging in matches while deliberately using callouts will help you internalize them. Consider recording your gameplay to analyze your communication style and pinpoint areas for improvement. This process will provide you insights into how effectively you relay information during critical moments, allowing you to adjust your approach accordingly.
Additionally, joining a team or a dedicated community can foster an environment where constructively critiquing each other’s communication becomes the norm. Pairing with more experienced players who excel at callouts can be particularly beneficial as they can offer tips and techniques that have worked for them. Being actively involved in such circles will help you learn and remember map-specific lingo and terminology more efficiently than going solo.
Using Workshop Maps for Skill Building
Methods for skill building through workshop maps can greatly enhance your understanding and usage of map callouts. There are countless community-created maps specifically designed for practice, allowing you to familiarize yourself with key locations without the pressure of a live match. Focused practice on these maps helps you associate callouts with actual locations and scenarios, leading to quicker recall during competitive play.
Building your skill set through these workshop maps leads to significant benefits. You can hone your movement, shooting, and callout skills simultaneously. Many of these maps include scenarios that simulate real match situations, enticing you to apply the skills you’ve been working on in an engaging way. You will not just memorize locations; instead, you’ll develop the intuition to react spontaneously and accurately under pressure.
Community Resources and Tools
With the expansive community around Counter-Strike, you have access to a treasure trove of resources and tools that can assist you in your quest to master map callouts. Forums, Discord servers, and YouTube channels are filled with tutorials and discussions that help players of all skill levels improve their game. Utilize these platforms to gain insights from others who have successfully navigated similar challenges.
In fact, the vast array of resources ensures you have different perspectives and strategies at your disposal. Take the time to participate in community discussions or seek out specific tutorials on map callouts that resonate with you. By leveraging these collective insights, you can enhance not only your communication skills but also your overall in-game performance and confidence. Engaging with these community tools will enrich your gaming experience tremendously.
Advanced Strategies Beyond Callouts
Keep your competitive edge sharp by delving deeper into combat strategies that go beyond basic map callouts. While understanding map layouts and being familiar with locations is imperative, mastering advanced strategies can significantly enhance your gameplay experience. Here’s a structured breakdown of advanced strategies to cycle through in your practice sessions:
- Utilize Psychological Warfare
- Read Your Enemy’s Strategies
- Adapt in Real Time During Matches
| Advanced Strategy | Description |
|---|---|
| Psychological Warfare | Employ tactics to intimidate or confuse the enemy. |
| Reading Enemy Strategies | Analyze patterns and tendencies of your opponents. |
| Adapting in Real Time | Modify your gameplay based on the unfolding situation. |
Psychological Warfare and Mind Games
Above all, psychological tactics can play a pivotal role in influencing the outcome of your matches. Implementing mind games such as making unexpected movements, switching up your positioning frequently, or feigning a strategy can create uncertainty in your opponents. These methods can lead to hasty decisions from the opposing side, giving you a strategic advantage. You might choose to bait your enemies by leaving a position seemingly unattended, only to counter their entry with a surprise ambush.
Furthermore, instilling doubt can have profound effects on your rivals’ performance. If they believe you are monitoring their actions or that you have a specific map territory under your control, they might play conservatively, allowing your team to capitalize on their hesitation. Utilizing communication tools to fake your team’s intent can be an effective way to manipulate their expectations and execute a planned strategy that takes advantage of their uncertainty.
Reading the Enemy’s Strategies
Mind your opponents’ nuances to grasp their approaches and predict their next moves. Observing how they position themselves, where their shots are coming from, and their timing can unveil their plans. If you notice consistent behaviors, such as specific locations they favor or repeated use of certain weapons, you can exploit these tendencies to outmaneuver them. When you tailor your strategies based on this intelligence, it gives you the tactical upper hand in exchanges.
Take your time to analyze and discuss the previous rounds with your teammates; retrospection can reveal invaluable details that enhance your understanding of your enemies. This information could lead to establishing effective defensive or offensive strategies that anticipate the enemies’ moves during crucial moments of the game.
In addition, understanding the psychology behind the enemy’s decisions can prove beneficial. If they seem shaken or frustrated, you can apply pressure by taking bold risks, forcing them to react impulsively. This can create openings for your team to take control of pivotal areas on the map.
Adapting in Real Time During Matches
Adapting your gameplay as the match develops is vital for keeping your strategy fluid. In real-time scenarios, your ability to assess the current situation and make swift adjustments can separate a successful player from an average one. Always be on the lookout for opportunities to shift tactics based on enemy behavior, map control, and your own team’s performance. When you can pivot effectively, you can counter the enemy’s plans and maximize your team’s performance.
Hence, developing a keen sense of awareness while in-game enables you to make split-second decisions that could change the tide of the match. If your teammates are falling prey to a coordinated strike, your immediate adjustments could not only save your team but potentially lead to a comeback. Stay vigilant and cultivate a mindset that encourages constant adaptation and improvement as you play.
Conclusion
The mastery of map callouts and strategic imperatives in Counter-Strike – Global Offensive is vital for enhancing your gameplay and team dynamics. By familiarizing yourself with each map’s callouts, you will improve communication with your teammates, allowing for quicker and more effective strategic planning during matches. Understanding the layout of the maps can greatly influence your positioning and decision-making, ultimately leading to more successful engagements and outcomes in your matches.
With a solid grasp of the various strategies applicable to each map, you can adapt to different situations and capitalize on your opponents’ weaknesses. Being aware of common tactics and map-specific advantages will elevate your performance, making you a more formidable player. As you continually refine your skills in map knowledge and strategic execution, you will not only enhance your personal gaming experience but also contribute significantly to your team’s success in Counter-Strike – Global Offensive.