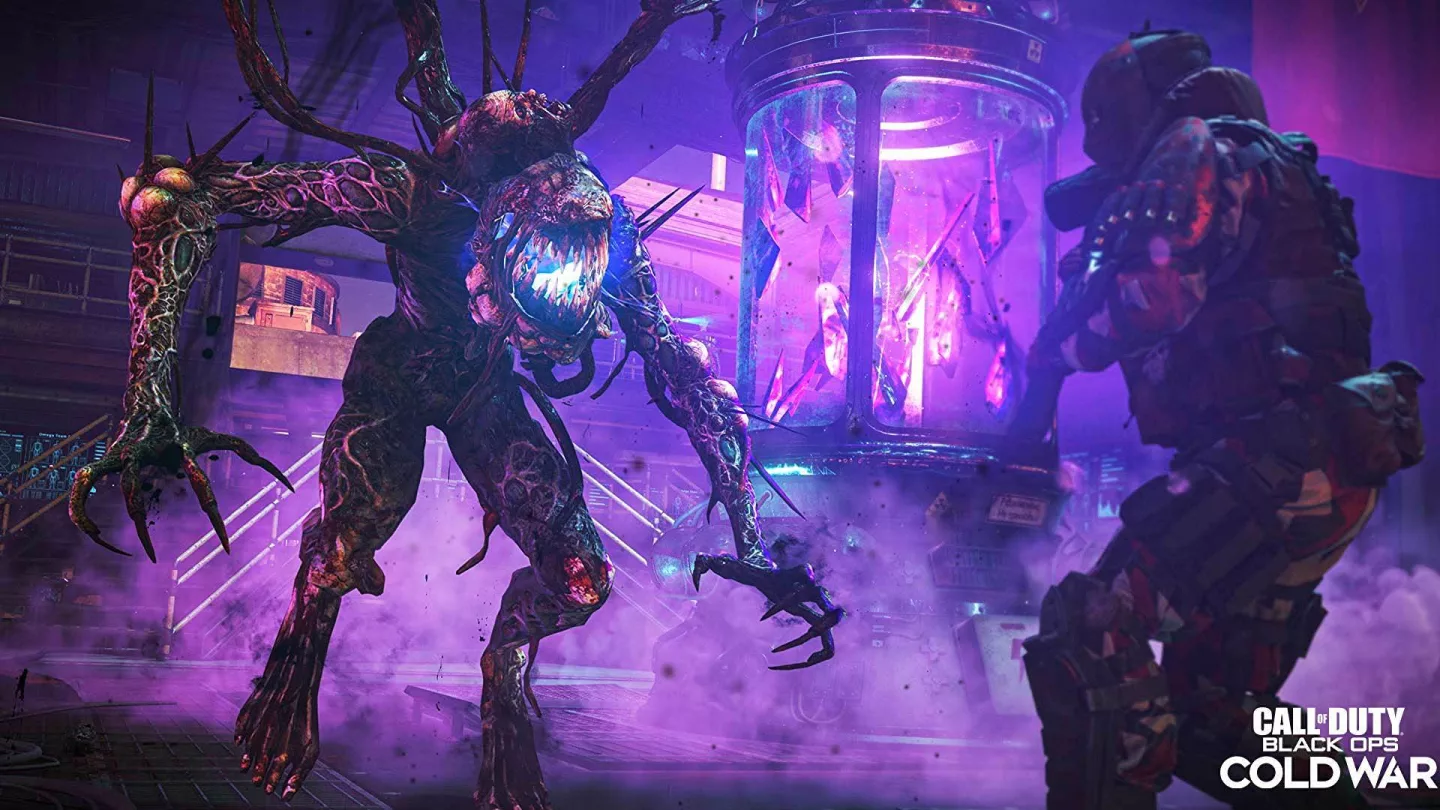
The Firebase Z Easter Egg quest in BOCW Zombies is giving you trouble? You have questions and don’t know how to get through the quest? Read the ultimate guide to the BOCW Zombies Firebase Z Easter Egg Quest here.
On Friday Treyarch finally added the Firebase Z Easter Egg Quest to BOCW Zombies. And it is very cool! But, as is often the case with Zombies Easter Egg Quests, it’s also quite complicated and slightly confusing. But don’t worry! Follow this guide step by step and you will complete the Firebase Z Easter Egg Quest in no time.
BOCW Zombies Firebase Z Easter Egg Quest: The First Steps
To begin, you’ll need to complete a few steps that should sound familiar to any veteran of Zombies Easter Eggs: you’ll need to turn on the power and activate the Pack-a-Punch machine. To do this, you’ll make your way to the atrium, where you’ll talk to Ravenov. He will then tell you about a teleporter that you need to use. This teleporter is located in the Equipment Storage and you need 1,250 points to unlock the way to it. This teleporter, believe me… it’s hard to miss.

After you go through the teleporter and land in Omega Base, you need to activate three ether reactors. All three need 500 points each to be activated.
- The first reactor is located in the Operations Center.
- The second reactor is located at the Military Command.
- The last reactor is located in the Data Center.
Once you have activated all the reactors, the power will be on and you can use the Pack-A-Punch machine at Ravenov to upgrade your weapon.
BOCW Zombies Firebase Z Easter Egg Quest: R.A.I. K-84 Wonder Weapon
The next step is relatively simple on paper: get the R.A.I. K-84 wonder weapon! However, it’s not that simple and requires one of three methods:
- Use the Mystery Box as many times as necessary until you pull out the Wonder Weapon. Extremely unlikely and potentially very expensive!
- The weapon is a possible reward for certain challenges.
- You collect the Blueprint and the individual parts of the weapon.
- The latter is the cheapest and most reliable method, and of course we’ll show you how to do it! You will need the Blueprint of the weapon and some parts:
Go to the weapons lab, the blueprint is hanging on a wall there.
Find Kuhlklay’s Eye in the Scorched Defense area next to a burning tank, scan it on the computer in the weapons lab and get the Locker Key.
Open the lockers in the Barracks until a Mimic spawns. Kill it to get the Barrel Assembly item.
For the next step you absolutely need a single shot weapon. Now it gets tricky: interact with the computer in the weapons lab, a rotating radar pops up and stops at three random locations. These locations are different for each player, so be sure to memorize them! Now go to the Mess Hall, where a dartboard hangs on a wall. Yes, you’re probably already thinking it – you now have to shoot at the numbers that correspond to the locations on the radar and then finish by shooting at the bullseye in the center of the dartboard. Hey, I know this sounds like we’re kidding you, but trust me, it works! If you complete the puzzle correctly, a secret compartment will open with another part for the wonder weapon.
To complete the R.A.I. K-84 wonder weapon, you only need one last piece – promise! The Energy Cell. To get the Energy Cell, you’ll need to kill a Mangler, a mini-boss that appears in Round 15.
To assemble the wonder weapon now, you need to go back to the workbench where you found the Blueprint and voila – you have one of the most awesome weapons in BOCW Zombies!

BOCW Zombies Firebase Z Easter Egg Quest: Dr. Peck and the Gas and the Mimics
For the next section, you’ll first need to talk to Dr. Peck – to do this, go to Mission Control and use the intercom. Then go back to Ravenov, who will give you an ID that you need to get three canisters of serum. These are located in lockers in the following places:
- Equipment Storage: on the first floor
- Colonel’s office: in the closet next to the desk
- Engineering: in the lower areas outside Mission Control
- Now you need to handle gas and capture mimics. How to do it:
Once you have all three canisters, go to the field hospital and use the chemical mixer.
Grab the item from the mixer and go to the OPC, above Mission Control. Place everything on the air conditioner.
Now go back to Mission Control and talk to Dr. Peck. After the cutscene, make your way to the Data Center, interact with the Memory Transference Station and take an Essence Trap from the machine.
Now you have to weaken and capture three Mimics. Once you have captured a Mimic (good luck!), return to the Memory Transference Station and place the trap in the machine. (We recommend that you search for Mimics in the following areas: Motor Pool, Colonel’s Office, Peck’s Quarters, and the Planning Offices).
Once you’ve delivered all three traps, you’ll get a disk!
BOCW Zombies Firebase Z Easter Egg Quest: Unlock the OPC & Collect Ether
With the disk in hand, head to the Planning Offices located above the Engineering Room. Find the computer located by the windows. Insert the disk into the computer to open the doors that lead to the OPC. Once inside, wait until the dialogue stops and watch as an anomaly appears. Return to Mission Control and talk to Dr. Peck, who will close the shutters. Afterwards, Ravenov will give you a code to open a nearby locker to the left of Peck’s window to retrieve the ether meter.
With the ether meter in hand, head to Scorched Defense. Go into the left bunker building and you will find a shovel leaning against the wall. With the shovel, you must now collect three ether containers buried all over the map and place them in three different ether reactors.
Open Lot: In the corner of the open lot you will find the container near the window of the Engineering building. When you dig it up, several fake containers spawn in the area. To find the right container, look for the one that doesn’t have black smoke coming out of the crystal. You can place this container in the Ether Reactor in Mission Control.
Jungle Defense: At the end of the path you will find the ether container at the edge of the map. You can place this container in the Ether Reactor in Military Command.
Barracks: You will find the last ether container in the corner to the right of the field hospital, not far from the stairs leading to the data center. The container will flee from you, so you’ll have to shoot it with the Miracle Weapon’s alternate fire mode to stop it. You can place this container in the Ether Reactor in the Data Center.

BOCW Zombies Firebase Z Easter Egg Quest: Align the Satellite
You will now have to wait for a call before proceeding. This may take a round or two, so make yourself a cup of tea first.
Okay, we’re refreshed and got the call. As instructed, go to the planning offices and find the desk where there is a computer and monitor on the wall. Interact with the computer and begin aligning the satellite.
WARNING: We are approaching the final boss fight in leaps and bounds. So before you finish the satellite puzzle, make sure you are as prepared as possible! Okay, on to the satellite!
To complete the satellite puzzle, simply move the white dot over the glowing yellow dots. In the lower right corner you will see a flag for each yellow dot. You will notice that one particular yellow dot contains a “?” instead. Interact with this yellow dot to align the satellite. After you have aligned the satellite, you will notice that a bright red beam shines above the map.
BOCW Zombies Firebase Z Easter Egg Quest: The Grand Finale vs. Orda
Once you’re ready, head to the OPC and interact with the computer terminal located to the right of the entrance to play a cutscene. And now it’s finally time for the grand finale, the big fight against ORDAAAAA.
Orda is similar to the boss zombie that spawns in wave 30. So, if you managed to successfully fight this particular version of the boss, you will be well prepared for the following battle. A few small tips for the fight against Orda:
It will get hectic very quickly, so be prepared to control the zombie masses with baits and monkey bombs.
Orda has several dangerous attacks, but be extra careful and make sure to avoid his one-hit slam attack at all costs. As soon as his hand raises, you should retreat.
Orda’s weak points are displayed when he attacks, so fire at his red glowing holes with your best weapons.
CALL OF DUTY – Guide – Tips and Tricks for Beginners
Get the upper hand with these tips and tricks for Call of Duty: Warzone. Call of Duty: Warzone is the new star in the Battle Royal sky. The Free2Play game, which was only launched at the beginning of March, set an incredible player record within a very short time. If you want to join the fray yourself, you can find useful tips and tricks for getting started in our beginner’s guide.
The Battle Royale mode in Call of Duty: Modern Warfare was a long time coming. Since March 10, CoD: Warzone has finally been available, and even as a free2play variant. So it’s no wonder that the multiplayer hit pulverized the player records of Apex Legends within a very short time. This is also due to the fact that Warzone does a few things differently compared to the well-known competition. If you’re planning to throw yourself into the fray and are still looking for a tip or two, you’ll definitely find what you’re looking for in this CoD: Warzone beginner’s guide.
Tip 1: What to consider before landing
Even during the approach sequence, you can see where the first circle is placed by opening the map, while the preferred landing position can be selected by pressing a button. These valuable seconds can be used to agree on a target together with your teammates.
Tip 2: The correct use of the parachute
As in any battle royale shooter, in CoD: Warzone it is important to land as quickly as possible after the jump and to be the first to grab the best weapons or items. This is achieved by opening the parachute after the jump and cutting it directly, which significantly increases the flight speed.
You can reopen and cut the parachute as many times as you like. This is especially useful for flying to destinations far from the flight path. Bonus tip: With the parachute cut, the character pulls out the pistol, which allows firing at enemies.
Tip 3: Life energy and armor
By default, each character in Warzone starts with two armor plates, the maximum being three bars. New plates can be found on the map, and having the most impeccable armor possible significantly increases your chances of victory. All three armor slots should always be filled, if possible (indicated by the blue HUD indicator at the bottom left).
If you take damage in battle, the self-healing known from the main game takes effect – there are no medikits in Warzone. If you are hit, you should simply take cover for a few seconds to regenerate your life energy.
Tip 4: Orders are worthwhile (some at least)
There are three different types of missions on the Verdansk map, marked with yellow tablet icons. Completing the missions rewards your team with additional money and bonus weapons that provide a decisive advantage in the fight for survival.
- Bounty mission (crosshair icon): Kill a given target
- Recon mission (flag icon): Secure and hold a specific area.
- Loot mission (binocular icon): Loot three loot boxes one after the other.
The looting missions bring the biggest advantage, since the three targets are in the immediate vicinity and reward your own team with a good chunk of money as well as powerful guns.
Tip 5: Listen carefully
Connoisseurs of the Call of Duty series know anyway how important a good headset is when playing. Of course, this also applies to Warzone mode. Footsteps of enemies in the vicinity, gunfire in the distance, loot boxes in the immediate vicinity – all of this can be picked out and those who can locate and interpret these acoustic signals have an enormous advantage.
Blue loot boxes, for example, which entice you with additional money and powerful weapons, can be located by a buzzing soundthat gets louder the closer you get to the object of your desire.
But the reconnaissance missions are not to be sneezed at either: If the team succeeds in completing them, the area of the next circle is marked on the tactics map. Thus, you learn in advance which areas will provide protection from the deadly gas.
Tip 6: What it’s worth spending money on
In the course of a round, you inevitably accumulate a considerable amount of money. But what should you spend it on anyway? Money is used in the Battle Royale shooter to request killstreaks or equipment drops at the store stations marked in green, or to bring back teammates who have died.
With a bit of luck, Killstreaks can also be found in loot boxes. Picking them up and using them is absolutely always recommended, as the advantage is enormous.
The in-game money can be invested in the following advantages at the buy stations, for example:
- Additional armor plates ($ 1500)
- Shield gun ($ 2000)
- Cluster Strike ($ 3000)
- Gas Mask ($ 3000)
- Precision Air Strike ($ 3500)
- UAV Drone ($ 4000)
- Self-Resuscitation ($ 4500)
- Squad resuscitation ($ 4500)
- Ammo Box ($ 5000)
- Equipment drop ($ 6000)
The UAV drone is the most rewarding, as it briefly reveals enemy positions in the area, as well as the equipment drop – the only way to use self-made loadouts and thus fully equipped weapons in Warzone.
Tip 7: What to look for in the Gulag
Warzone features a respawn system unique to the genre in the form of the Gulag. Players who have died in Verdansk are shipped to the prison, where they fight in a 1-vs-1 against another player to get back in. Those who lose can only be resurrected by their teammates from then on.
Other players who enter the gulag initially start as spectators on the upper tiers. Teammates can give instructions about the opponent’s position here, for example, but all players have the opportunity to influence the fight that is currently taking place – by throwing stones.
Just like a stun grenade, the stone doe’s one point of damage and is more suited to distracting the players below. However, with some skill, it can also be used to make kills, for example by triggering C4.
Since the lighting in the Gulag is not very good, enemies are correspondingly difficult to spot in the semi-dark. However, there is a simple trick to change that. CoD: Warzone allows you to spray spray logos on walls and other environments – as well as enemies – at the touch of a button. This can be turned into an advantage by making your opponent shine brightly with some yellow paint.
More quick tips for Call of Duty: Warzone
- In sprint mode doors can be broken down immediately, in target mode they can be opened carefully
- Enemies can be instantly eliminated in close combat from behind with a special animation
- Use the ping system to mark enemies for your team
- Air strikes and cluster strikes can be used on helicopters and other vehicles
- Watch out for a white glow in your surroundings – this signals reflections in a sniper’s scope
- Loot time can be significantly shortened by a simple trick when playing with controller
CallofDutyGuides, CallofDuty, Heroes&WIKI, CoDGuides, CoDGuide, CallofDutyGuide, CoD


