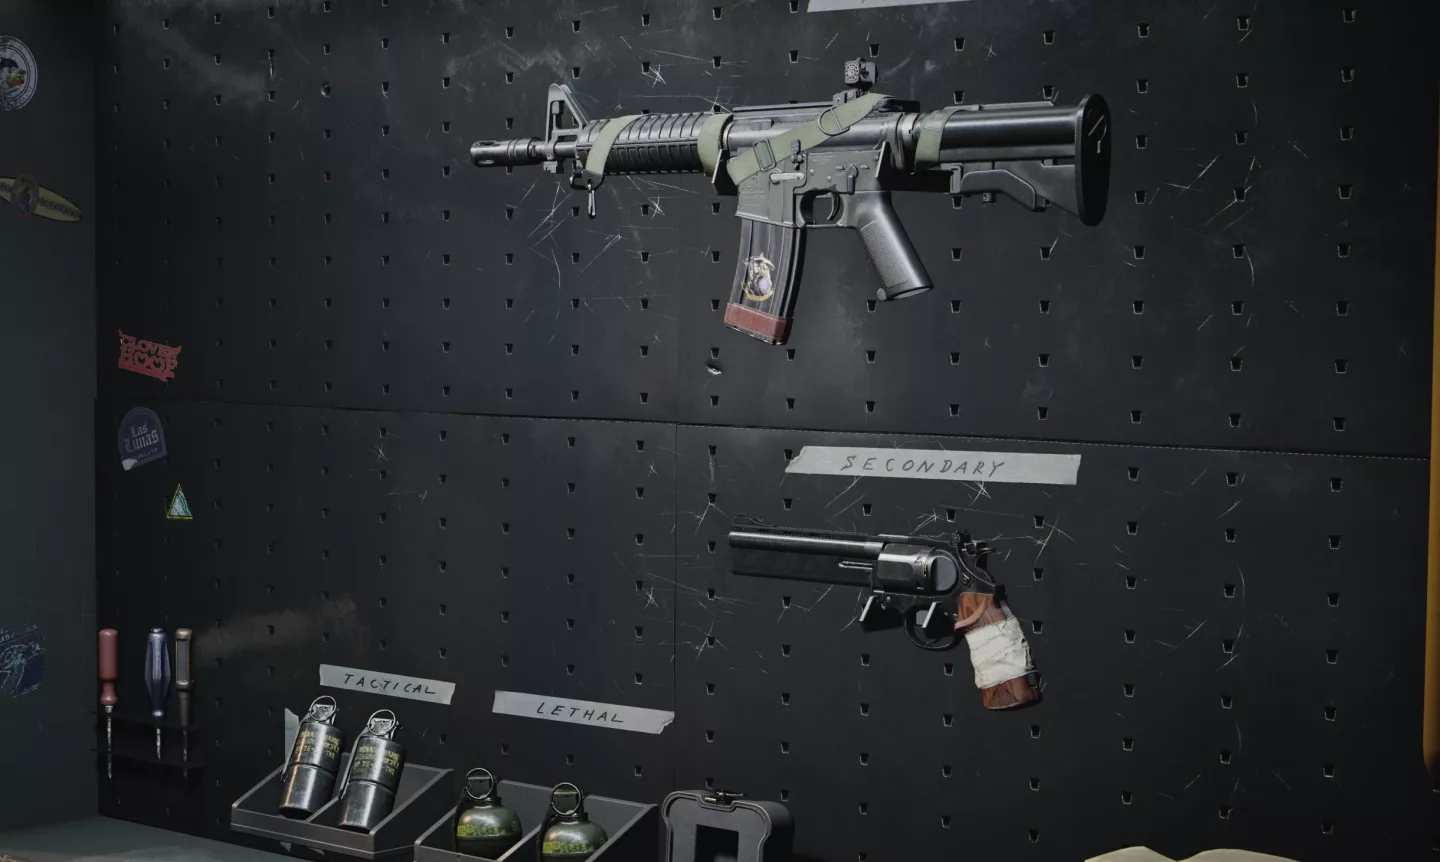
We’re slowly working our way through all the weapons in Black Ops Cold War to give you the best setups for each gun. Today we’re going to look at the only revolver in the game that isn’t actually that awesome, but then it kind of is: the Magnum.
Looking for the best weapons in Call of Duty: Black Ops Cold War? You’ve already found a favorite weapon, but you want to know which attachments you can use to get the most out of it? Then you’ve come to the right place! We’ll show you the current best weapons in Black Ops Cold War in galleries and in more detail in our setup guides.
The time has come, today we’ll take care of the last regular weapon in Black Ops Cold War that has been in the game from the beginning. It’s also the last handgun – at least until one of the future – Season s brings supplies. Here you can find a selection of our latest setup guides:
The Magnum Revolver is unlocked at level 49 as the last handgun, and at first glance it’s not even that cool… Only six rounds in the barrel, forever-long reload time, and despite high damage, not even a one-shot at short range. Oh well, the rate of fire isn’t really outstanding either. Sounds pretty bad, doesn’t it? It is, as a secondary weapon you are much better off with the Diamatti or the 1911.
With the right attachments and the right playing style, you can still have fun with the Magnum. Surely you remember the hated, absolutely exaggerated .357 Snake Shot setup from Modern Warfare? Our Akimbo Magnum setup is not quite as extreme, but still strong, and will blow away anything at short range with one hit.
Magnum Setup
Since the gunslinger wildcard only affects primary weapons, only five attachments can be used on pistols. With this setup you get the best out of the weapon:

Since the Magnum performs very disappointingly individually, we rely on Akimbo and maximum damage. With this setup, you have to avoid long distances, but you can shoot everything with one hit at short distances:
- Barrel: 7.2″ Special Command
- Body: SWAT-5mw laser marker
- Magazine: Rapid burst 12-round magazine
- Handle: Field tape
- Stock: Two handed
With the special command barrel we get 17% more damage, 40% range and 120% projectile acceleration. The damage is maximized by the Two-Handed attachment – logical, right? Two revolvers, double damage. Since we can’t aim more with two revolvers, we increase the precision from the hip by 35% with the laser. The larger magazine gives us six more bullets per magazine, so with two revolvers we get a total of 24 rounds. Finally, with the field tape, we increase flinch resistance by 90%.
With this setup, you must always keep moving and look for fights at close range. Pull the trigger with both revolvers at the same time and you’ll always land a one-shot. Yes, this setup has limited uses and any other gun is probably more versatile and reliable, but it’s still fun.
CALL OF DUTY – Guide – Tips and Tricks for Beginners
Get the upper hand with these tips and tricks for Call of Duty: Warzone. Call of Duty: Warzone is the new star in the Battle Royal sky. The Free2Play game, which was only launched at the beginning of March, set an incredible player record within a very short time. If you want to join the fray yourself, you can find useful tips and tricks for getting started in our beginner’s guide.
The Battle Royale mode in Call of Duty: Modern Warfare was a long time coming. Since March 10, CoD: Warzone has finally been available, and even as a free2play variant. So it’s no wonder that the multiplayer hit pulverized the player records of Apex Legends within a very short time. This is also due to the fact that Warzone does a few things differently compared to the well-known competition. If you’re planning to throw yourself into the fray and are still looking for a tip or two, you’ll definitely find what you’re looking for in this CoD: Warzone beginner’s guide.
Tip 1: What to consider before landing
Even during the approach sequence, you can see where the first circle is placed by opening the map, while the preferred landing position can be selected by pressing a button. These valuable seconds can be used to agree on a target together with your teammates.
Tip 2: The correct use of the parachute
As in any battle royale shooter, in CoD: Warzone it is important to land as quickly as possible after the jump and to be the first to grab the best weapons or items. This is achieved by opening the parachute after the jump and cutting it directly, which significantly increases the flight speed.
You can reopen and cut the parachute as many times as you like. This is especially useful for flying to destinations far from the flight path. Bonus tip: With the parachute cut, the character pulls out the pistol, which allows firing at enemies.
Tip 3: Life energy and armor
By default, each character in Warzone starts with two armor plates, the maximum being three bars. New plates can be found on the map, and having the most impeccable armor possible significantly increases your chances of victory. All three armor slots should always be filled, if possible (indicated by the blue HUD indicator at the bottom left).
If you take damage in battle, the self-healing known from the main game takes effect – there are no medikits in Warzone. If you are hit, you should simply take cover for a few seconds to regenerate your life energy.
Tip 4: Orders are worthwhile (some at least)
There are three different types of missions on the Verdansk map, marked with yellow tablet icons. Completing the missions rewards your team with additional money and bonus weapons that provide a decisive advantage in the fight for survival.
- Bounty mission (crosshair icon): Kill a given target
- Recon mission (flag icon): Secure and hold a specific area.
- Loot mission (binocular icon): Loot three loot boxes one after the other.
The looting missions bring the biggest advantage, since the three targets are in the immediate vicinity and reward your own team with a good chunk of money as well as powerful guns.
Tip 5: Listen carefully
Connoisseurs of the Call of Duty series know anyway how important a good headset is when playing. Of course, this also applies to Warzone mode. Footsteps of enemies in the vicinity, gunfire in the distance, loot boxes in the immediate vicinity – all of this can be picked out and those who can locate and interpret these acoustic signals have an enormous advantage.
Blue loot boxes, for example, which entice you with additional money and powerful weapons, can be located by a buzzing soundthat gets louder the closer you get to the object of your desire.
But the reconnaissance missions are not to be sneezed at either: If the team succeeds in completing them, the area of the next circle is marked on the tactics map. Thus, you learn in advance which areas will provide protection from the deadly gas.
Tip 6: What it’s worth spending money on
In the course of a round, you inevitably accumulate a considerable amount of money. But what should you spend it on anyway? Money is used in the Battle Royale shooter to request killstreaks or equipment drops at the store stations marked in green, or to bring back teammates who have died.
With a bit of luck, Killstreaks can also be found in loot boxes. Picking them up and using them is absolutely always recommended, as the advantage is enormous.
The in-game money can be invested in the following advantages at the buy stations, for example:
- Additional armor plates ($ 1500)
- Shield gun ($ 2000)
- Cluster Strike ($ 3000)
- Gas Mask ($ 3000)
- Precision Air Strike ($ 3500)
- UAV Drone ($ 4000)
- Self-Resuscitation ($ 4500)
- Squad resuscitation ($ 4500)
- Ammo Box ($ 5000)
- Equipment drop ($ 6000)
The UAV drone is the most rewarding, as it briefly reveals enemy positions in the area, as well as the equipment drop – the only way to use self-made loadouts and thus fully equipped weapons in Warzone.
Tip 7: What to look for in the Gulag
Warzone features a respawn system unique to the genre in the form of the Gulag. Players who have died in Verdansk are shipped to the prison, where they fight in a 1-vs-1 against another player to get back in. Those who lose can only be resurrected by their teammates from then on.
Other players who enter the gulag initially start as spectators on the upper tiers. Teammates can give instructions about the opponent’s position here, for example, but all players have the opportunity to influence the fight that is currently taking place – by throwing stones.
Just like a stun grenade, the stone doe’s one point of damage and is more suited to distracting the players below. However, with some skill, it can also be used to make kills, for example by triggering C4.
Since the lighting in the Gulag is not very good, enemies are correspondingly difficult to spot in the semi-dark. However, there is a simple trick to change that. CoD: Warzone allows you to spray spray logos on walls and other environments – as well as enemies – at the touch of a button. This can be turned into an advantage by making your opponent shine brightly with some yellow paint.
More quick tips for Call of Duty: Warzone
- In sprint mode doors can be broken down immediately, in target mode they can be opened carefully
- Enemies can be instantly eliminated in close combat from behind with a special animation
- Use the ping system to mark enemies for your team
- Air strikes and cluster strikes can be used on helicopters and other vehicles
- Watch out for a white glow in your surroundings – this signals reflections in a sniper’s scope
- Loot time can be significantly shortened by a simple trick when playing with controller
CallofDutyGuides, CallofDuty, Heroes&WIKI, CoDGuides, CoDGuide, CallofDutyGuide, CoD


